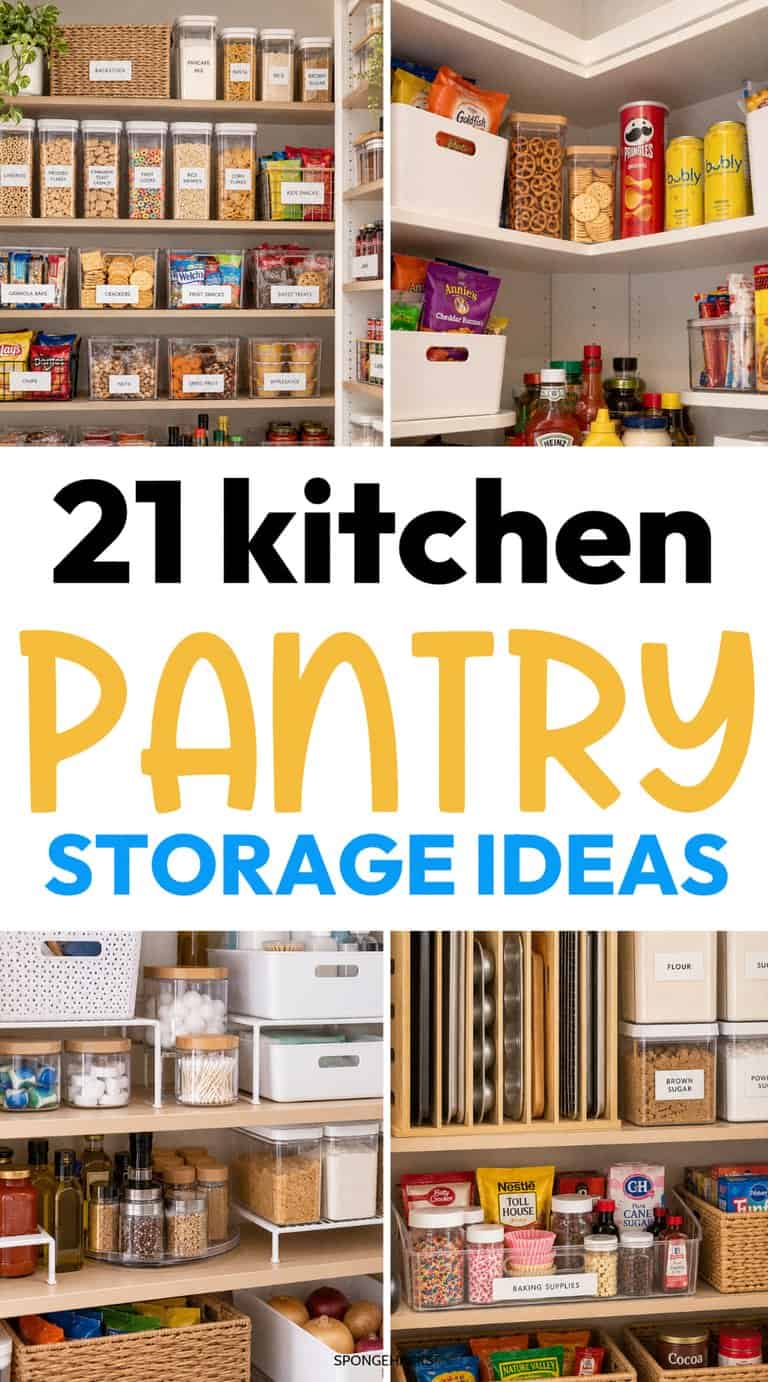
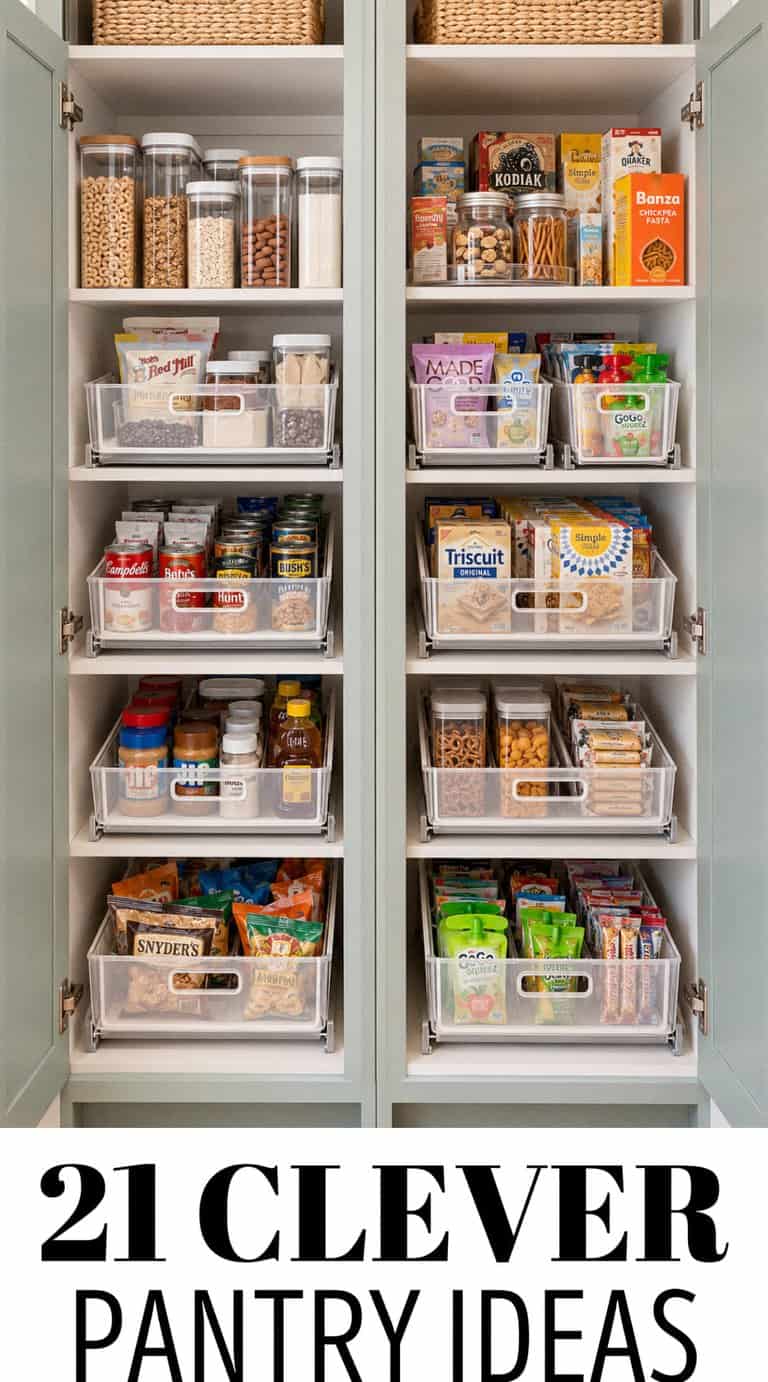
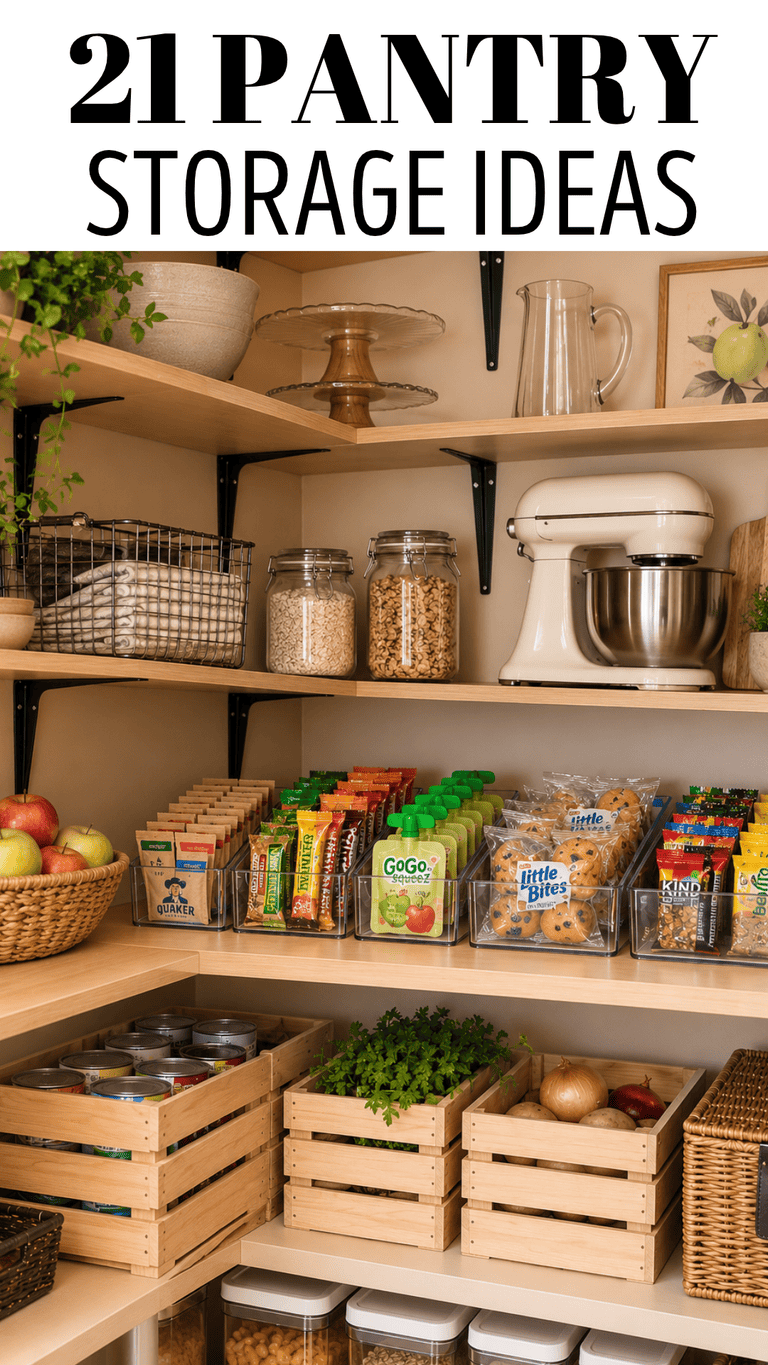
I swear, the moment I finish grocery shopping and put everything away, my pantry is already a mess again!
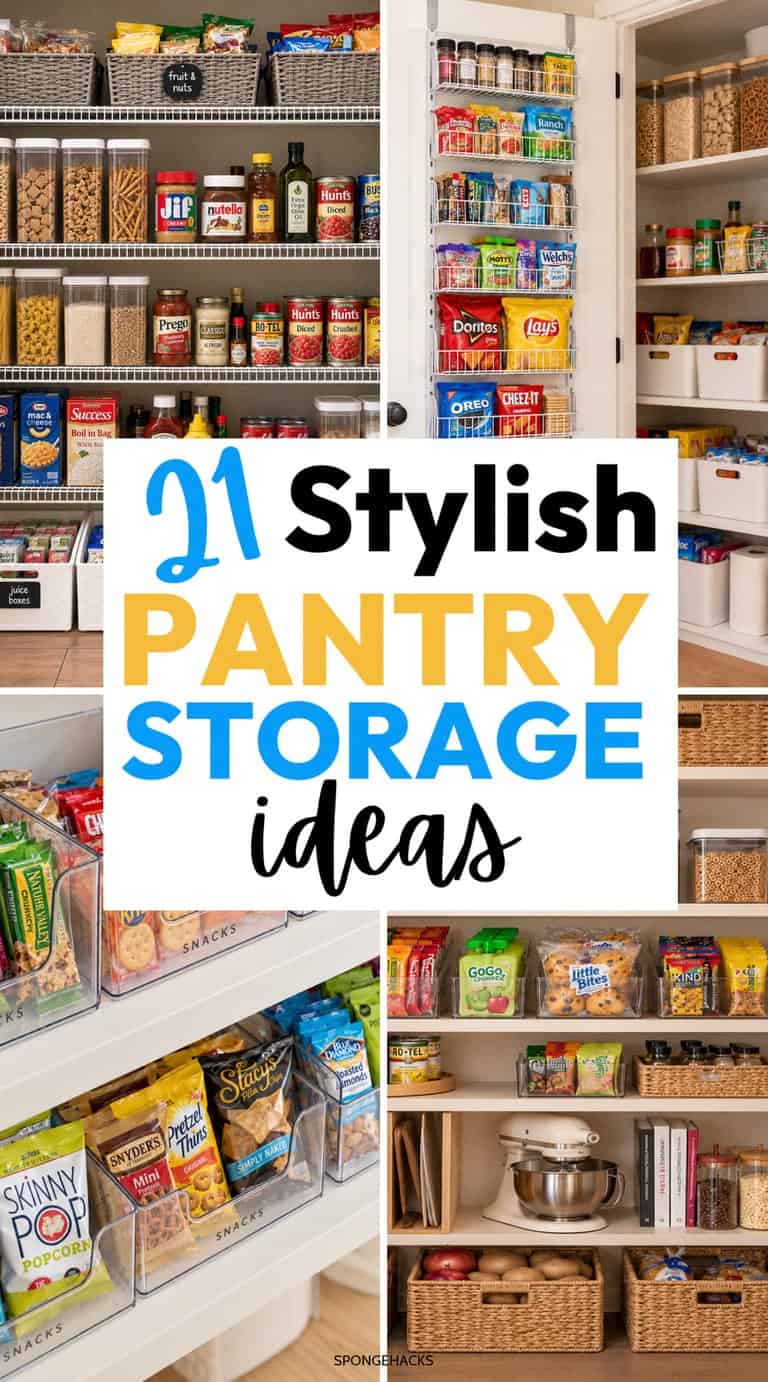
With two teens in the house, snacks disappear faster than I can buy them, and somehow, I’m always left with half-empty cereal boxes, open bags of crackers, granola bars shoved into random corners, and extra boxes of food that don’t seem to have a home.
And don’t even get me started on buying another box of crackers because I couldn’t find the THREE boxes hiding behind everything else!
Sound familiar?
I love having a stocked pantry, especially when the kids come home from school absolutely starving and want something to eat RIGHT NOW.
But I also love opening my pantry and actually being able to see what we have without moving five things out of the way.
That’s why I’ve been looking into easy pantry storage ideas that make sense for a busy family.
I’m talking about clear containers for cereal, cute baskets for snacks, simple shelf organizers, and clever ways to use every inch of space without making the pantry look like a grocery store exploded.
And the best part? You don’t need a huge walk-in pantry or an expensive organizing system to make it work.
If you’re dealing with deep shelves, a tiny pantry closet, or just WAY too many snack boxes, these pantry organization ideas will help you find what you need, keep food from getting lost, and maybe even make grocery day a little less chaotic!
Let’s get that pantry organized!
Pantry Storage Containers and Organizers You Need
Before you start pulling everything out of your pantry and organizing like crazy, let’s talk about what you actually need!
The trick is choosing a few pantry storage essentials that make it easier to see what you have, keep food fresh, and stop those half-empty boxes from taking over your shelves.
Here are some of my favorite things to use for an organized pantry:
- Clear airtight food containers: These are perfect for cereal, pasta, rice, flour, sugar, and other dry goods. Choose stackable containers with wide openings so they’re easy to refill and you can see when you’re running low.
- Plastic or acrylic storage bins: I love these for organizing individually wrapped snacks like granola bars, fruit snacks, crackers, and protein bars. Give each snack category its own bin so the kids know exactly where to look.
- Woven or wire baskets: These are great for hiding less attractive packaging while keeping everything together. Use them for extra bags of chips, bread, potatoes, or those random pantry items that don’t fit anywhere else.
- Lazy Susans: Seriously, these little rotating organizers are SO handy! Put one in a pantry corner for oils, sauces, peanut butter, honey, and other jars that always seem to get pushed to the back.
- Tiered shelf risers: If you have a collection of canned soups, vegetables, or pasta sauces, a tiered organizer lets you see the labels in the back without pulling everything out.
- Stackable shelf organizers: These add an extra level of storage to tall pantry shelves. They’re especially useful for stacking plates, smaller containers, or canned goods without wasting all that vertical space.
- Over-the-door pantry organizers: If you’re working with a small pantry, don’t forget about the door! A hanging rack with shallow baskets can hold seasoning packets, snack pouches, and other lightweight items.
- Pantry labels: You don’t need a fancy label maker, either! Simple waterproof stickers work great for identifying containers, especially when you’re storing similar-looking ingredients like flour, powdered sugar, and baking mixes.
- Can organizers: These help keep canned foods together instead of having them scattered across different shelves. Look for a stepped rack or a rolling dispenser that fits the size of cans your family buys.
- Under-shelf baskets: These slide onto an existing shelf and create extra storage underneath. They’re perfect for lightweight items like tortillas, napkins, or small snack bags.
My Tip for Organizing a Family Pantry
So before you start buying a bunch of matching containers, take everything out of your pantry and group similar foods together.
Put all the breakfast foods in one pile, snacks in another, baking supplies together, and extra unopened boxes in their own group.
You’ll probably discover you have more food than you thought!
Then measure your shelves before shopping for containers. There’s nothing more frustrating than buying a beautiful set of organizers only to discover they’re too tall for your pantry.
And if you have teens like I do, create a dedicated snack zone on a shelf they can easily reach.
Fill a couple of open bins with their favorite grab-and-go snacks, keep backup boxes on a higher shelf, and refill the bins when they’re getting empty.
That way, the kids aren’t digging through the entire pantry looking for one granola bar, and you can quickly see what needs to go on your next grocery list.
Because a pretty pantry is nice, but a pantry that actually STAYS organized? That’s the dream!
23 Easy Pantry Storage Ideas for Small and Basic Pantries
You don’t need one of those HUGE walk-in pantries to have an organized kitchen!
In fact, I don’t even have a built-in pantry in my home.
I ended up buying a standalone pantry cabinet because I needed somewhere to store all our cereal, crackers, snacks, canned goods, and extra groceries.
And with two teens in the house, that pantry fills up FAST!
So, whether you have a small built-in pantry, a narrow kitchen cupboard, or a freestanding pantry cabinet like mine, these storage ideas will help you make the most of every shelf.
1. Use Clear Bins for All Those Snacks
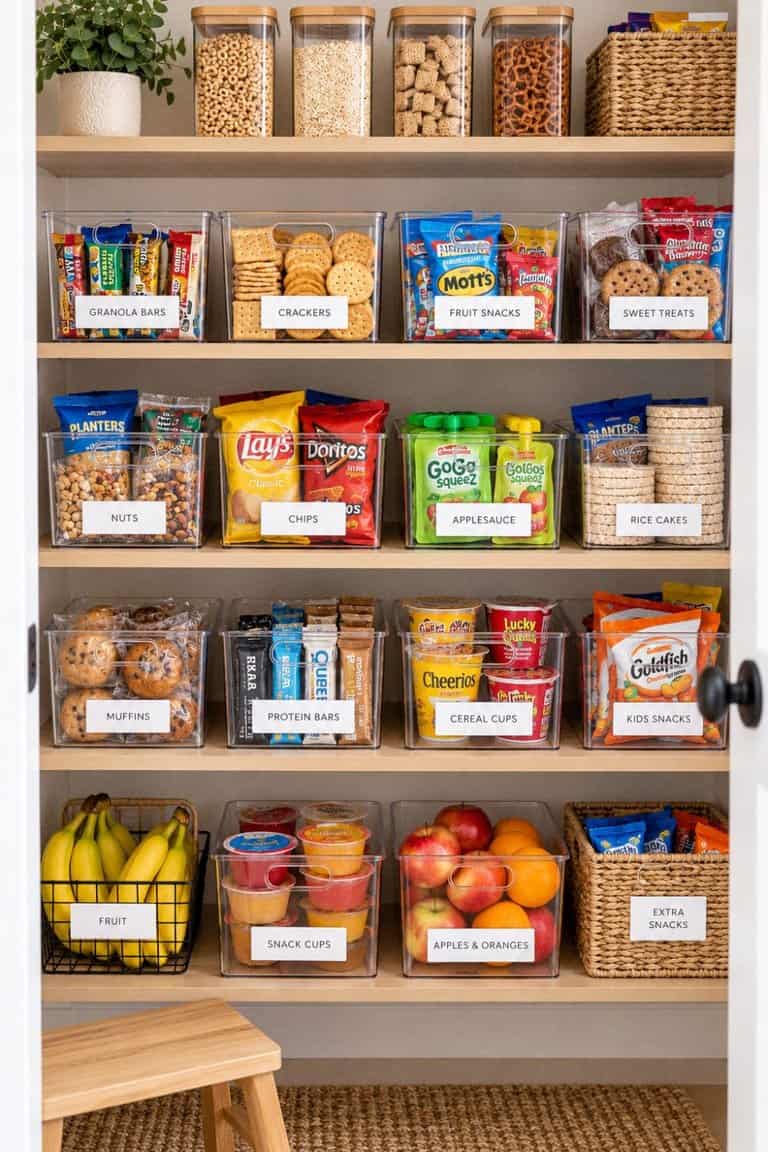
If there’s one thing my pantry is always overflowing with, it’s snacks!
Instead of keeping granola bars, crackers, fruit snacks, and other individually wrapped treats in their original cardboard boxes, take everything out and sort it into clear plastic bins.
Use one bin for granola bars, another for crackers, and another for sweet treats.
Choose bins with handles so the kids can pull one out, grab what they want, and slide it back onto the shelf.
2. Add Stackable Containers for Cereal
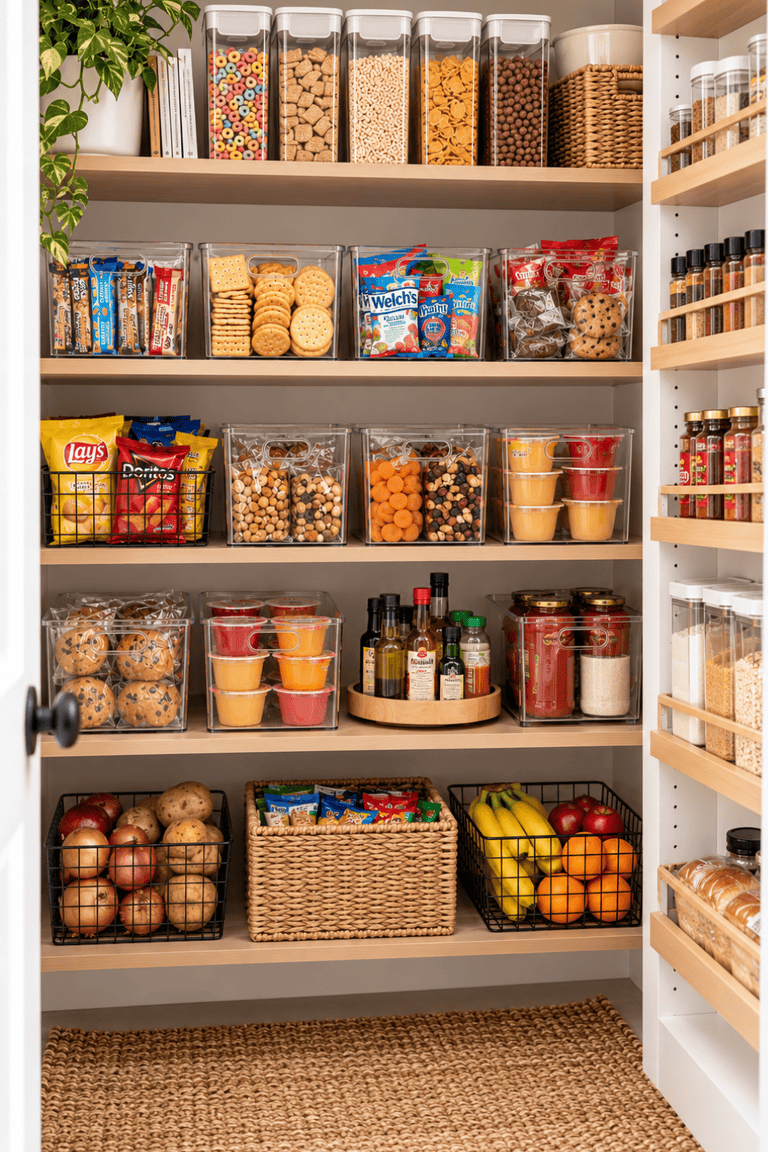
Cereal boxes take up SO much room, especially when you have three or four different kinds open at once.
Try transferring cereal into tall, airtight containers with easy-pour lids.
Look for narrow rectangular containers instead of round ones because they’ll fit neatly side by side without wasting shelf space.
Before buying, measure the height of your pantry shelves and choose containers that leave enough room to open the lids.
3. Create a Dedicated Snack Shelf
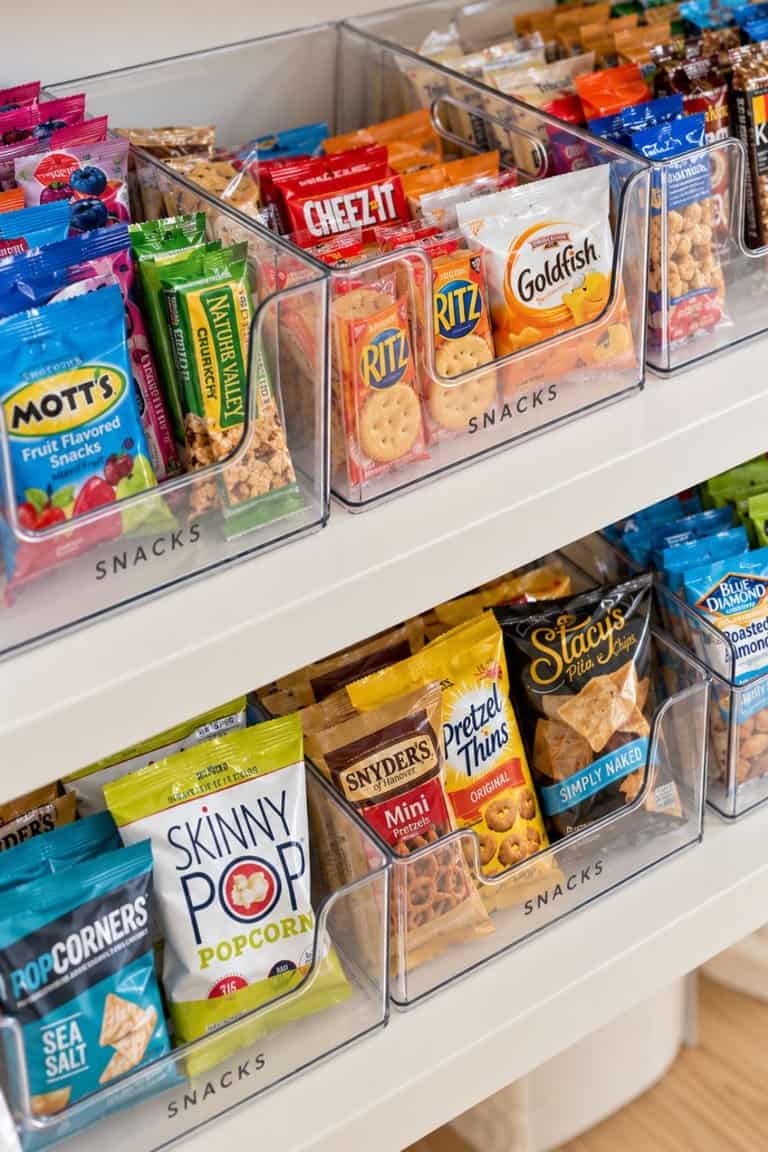
This is probably one of my favorite ideas for families with older kids.
Instead of having snacks scattered throughout the pantry, give them their own shelf.
Use two or three clear bins for chips, crackers, and granola bars, and put the snacks your teens grab most often at the front.
Keep extra unopened packages somewhere else so the snack shelf doesn’t become overcrowded.
And when the kids ask what there is to eat, you can just point them toward their shelf!
4. Use Shelf Risers to Double Your Storage
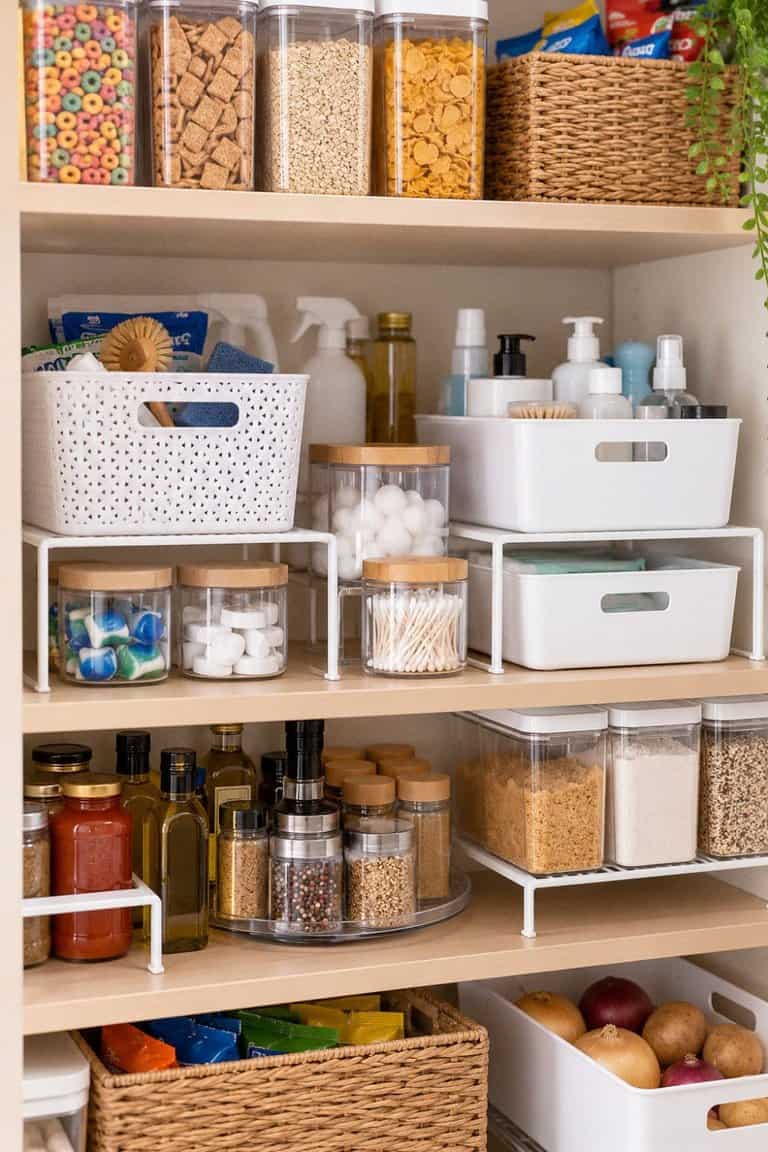
Have you ever noticed how much empty space there is above short cans and jars?
That’s valuable pantry space!
Add a sturdy shelf riser to create two levels of storage on one shelf.
You can keep canned vegetables or soups underneath and smaller containers or jars on top.
Just make sure the riser is strong enough for whatever you’re storing, especially if you’re stacking heavier canned goods.
5. Add a Lazy Susan for Jars and Condiments
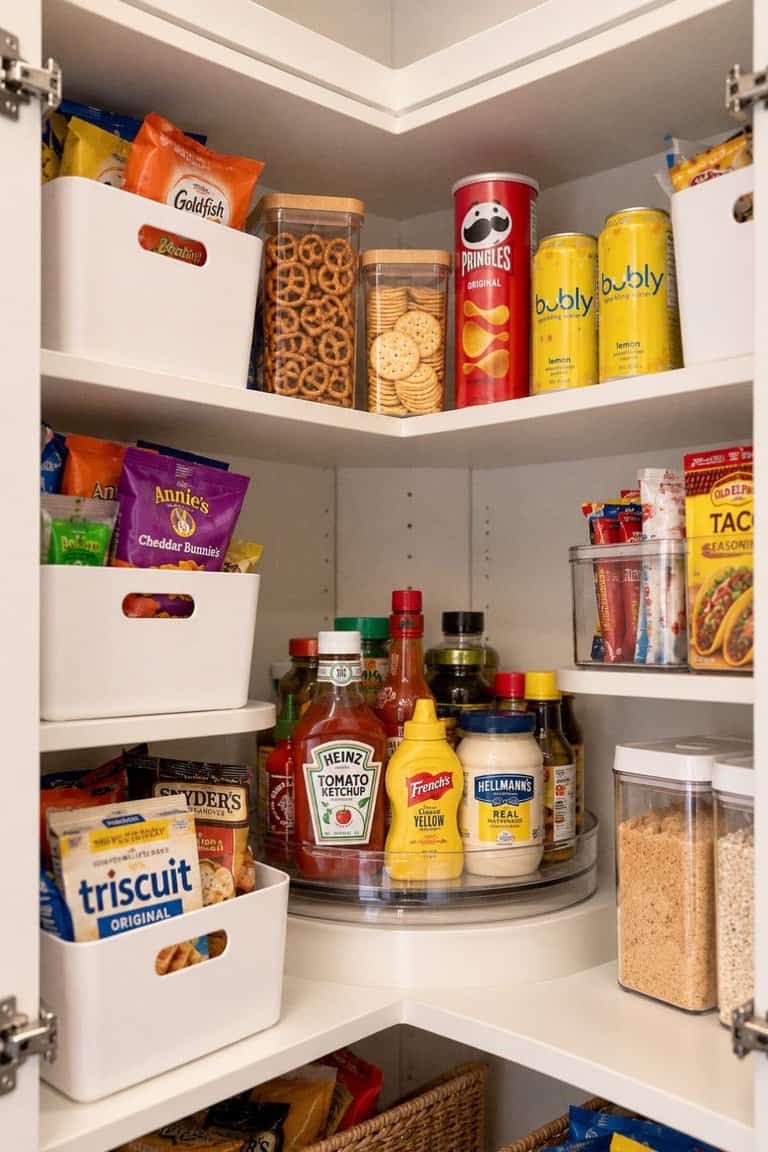
Those little jars of peanut butter, honey, sauces, and spreads always seem to disappear into the back corners of my pantry.
A Lazy Susan solves that problem!
Place a rotating tray on one shelf and arrange your smaller jars around it.
When you need something, give it a spin instead of pulling everything out.
This works especially well in deeper pantry cabinets where reaching the back can be a pain.
6. Store Extra Grocery Boxes in One Overflow Basket
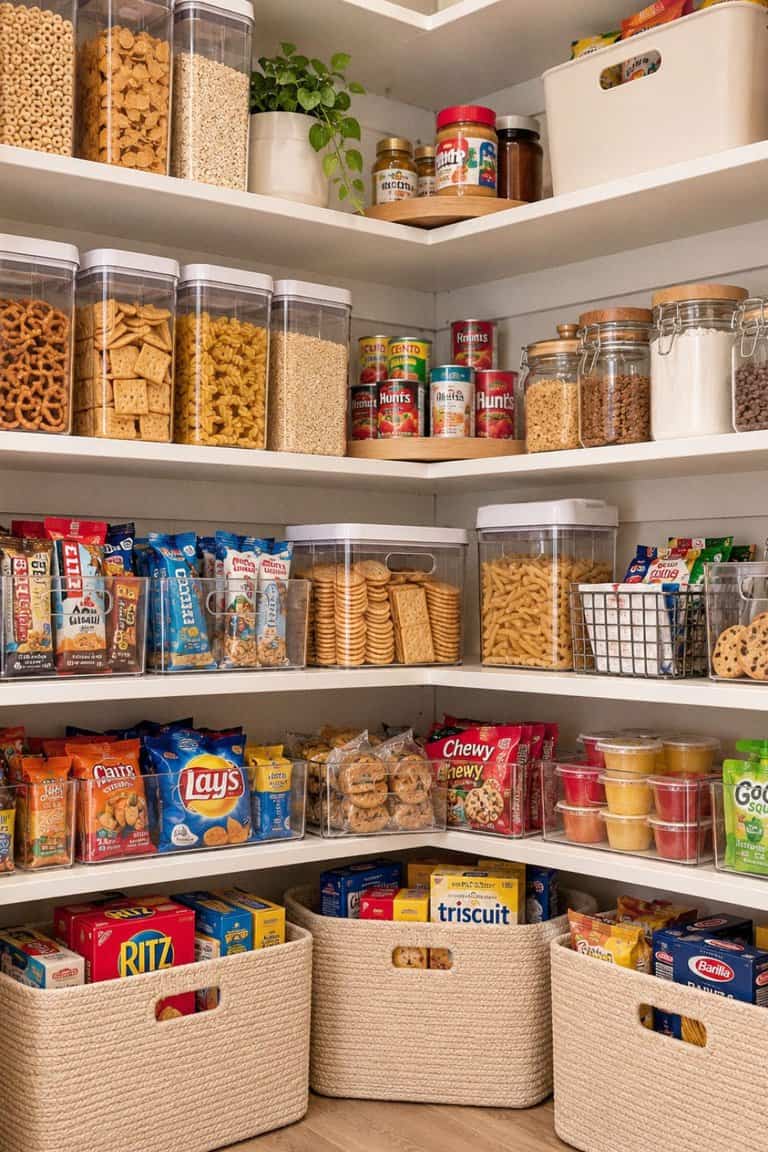
You know when cereal or crackers go on sale, so you buy a few extra boxes?
Well, those extras need somewhere to go!
Designate one large basket or bin for unopened backup packages.
Keep it on a lower or upper shelf, depending on the weight, and only move items into your everyday snack containers when they need refilling.
This keeps your pantry from looking like you’ve just unloaded an entire grocery cart onto the shelves.
7. Use Narrow Bins for Pasta and Rice
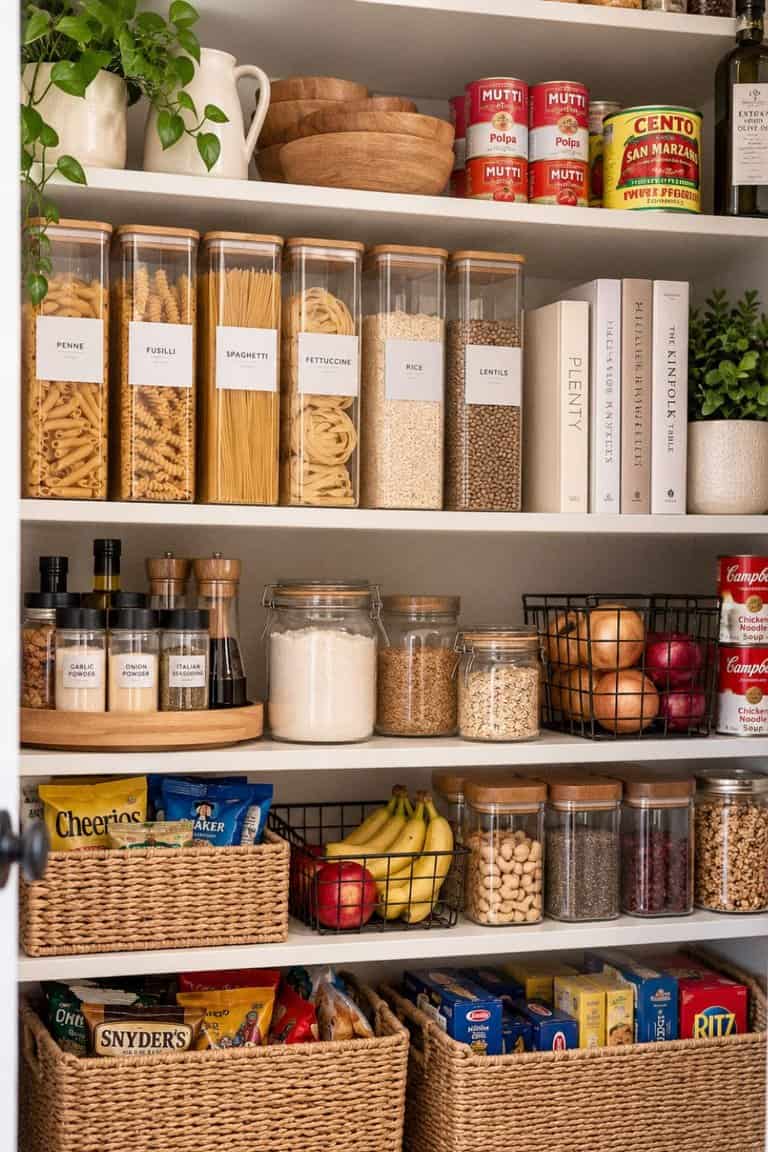
Instead of having half-open bags of rice, pasta, and noodles falling over every time you open the pantry, give them their own containers.
Tall, narrow containers are perfect for spaghetti, while shorter rectangular ones work for rice, macaroni, and other pasta shapes.
If you don’t want to transfer everything out of its packaging, use a narrow plastic bin to keep the bags standing upright together.
8. Install an Over-the-Door Storage Rack
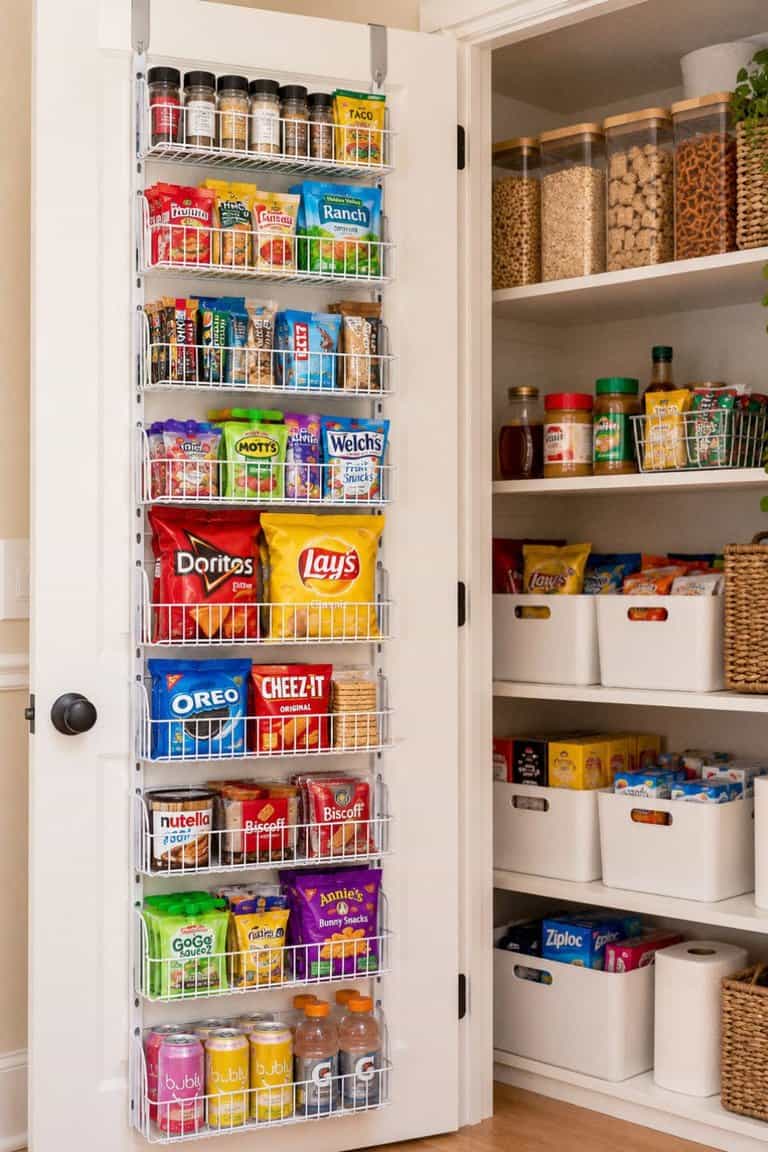
If your pantry has a regular hinged door, you might be missing out on some seriously useful storage space.
An over-the-door rack can hold small packets, seasoning mixes, snack pouches, and lightweight food items.
Choose one with shallow baskets so it doesn’t bump into your pantry shelves when you close the door.
For a freestanding pantry cabinet, check the door clearance and hinges first because some cabinets won’t support a hanging organizer.
9. Organize Canned Foods With Tiered Shelves
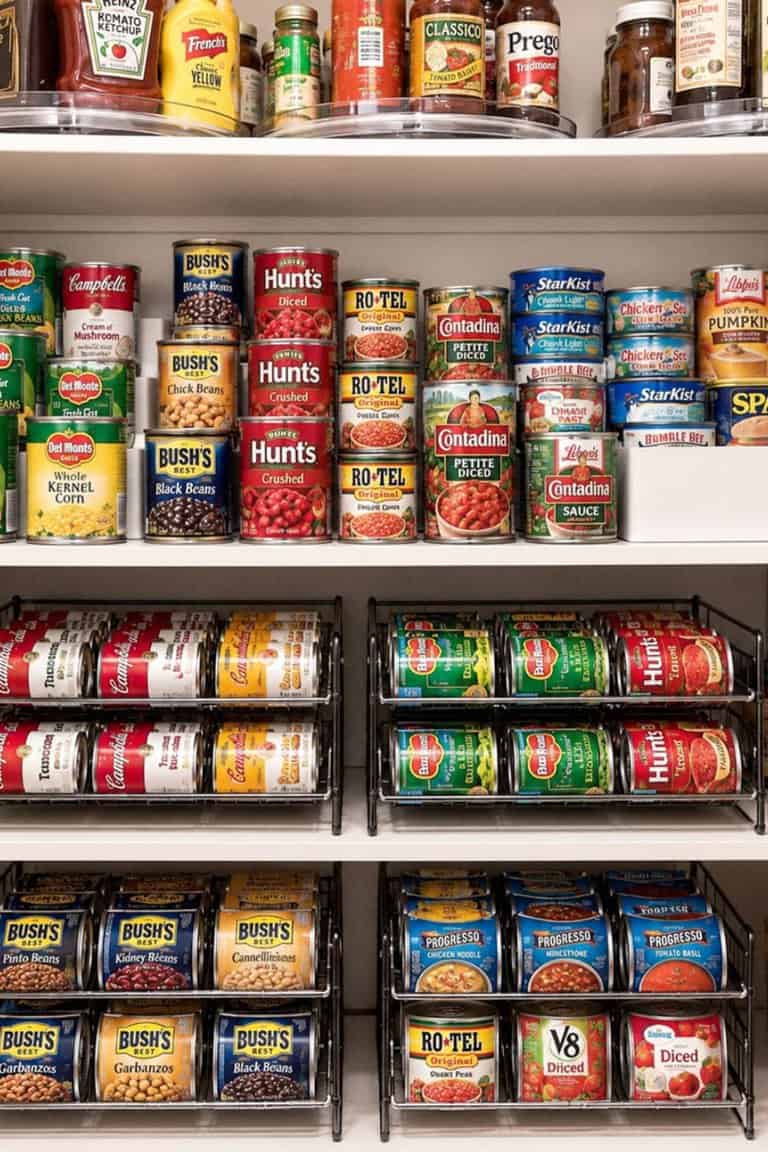
I don’t know about you, but I hate buying another can of tomato soup only to discover I already had four hiding in the pantry!
A tiered shelf organizer makes it SO much easier to see everything.
Arrange your cans in rows with the tallest ones at the back and shorter ones at the front.
You can also group them by type, like soups, vegetables, beans, and canned tomatoes.
Now you can see what you have before making your grocery list.
10. Add Pull-Out Bins to Deep Pantry Shelves
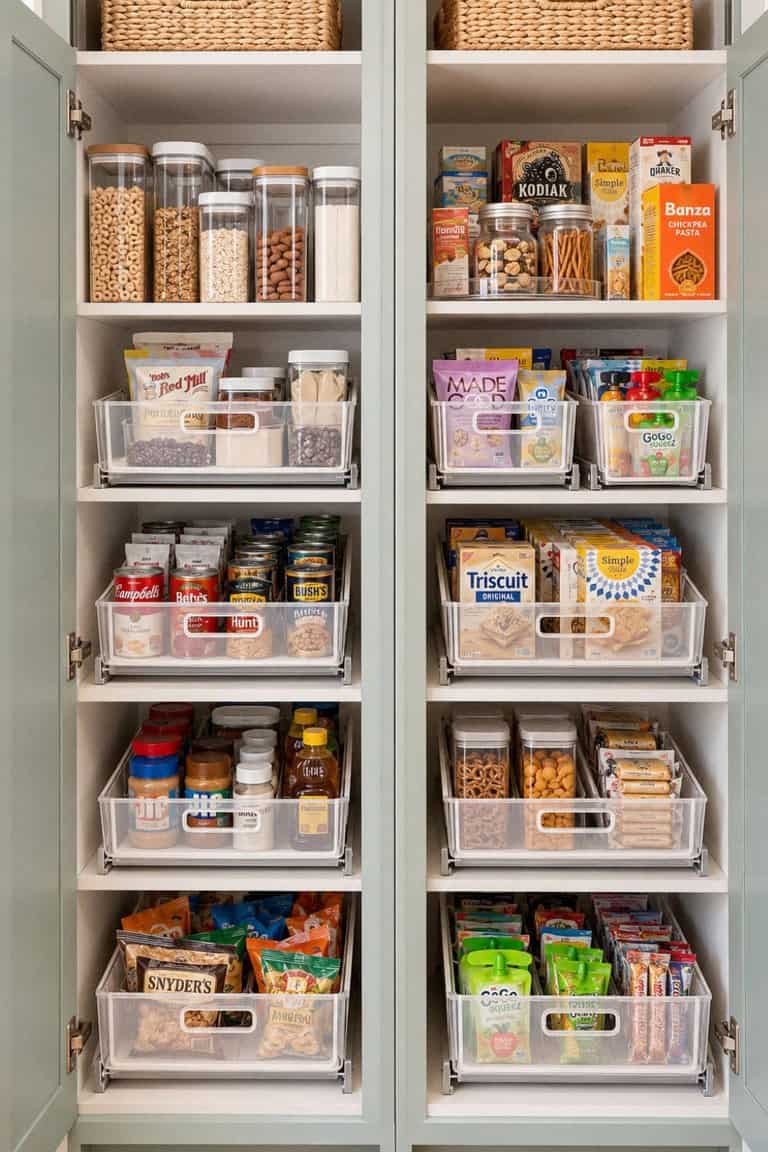
Deep shelves sound great until everything gets pushed to the back and forgotten.
Instead of stacking food in rows you can’t reach, use long pull-out bins.
Put baking supplies in one, packaged side dishes in another, and canned goods in a sturdy bin on a lower shelf.
Look for bins with handles and straight sides so you can slide them out without knocking over everything beside them.
It’s like having pantry drawers without actually installing drawers!
11. Use Under-Shelf Baskets for Extra Space
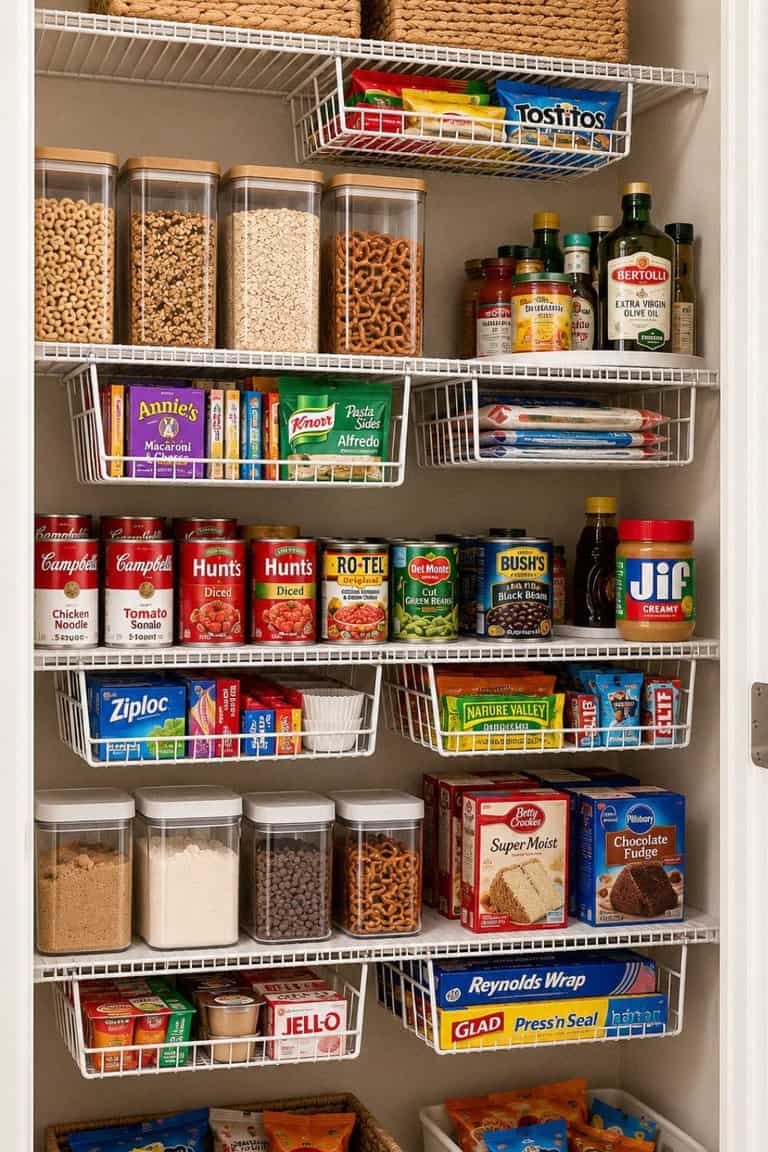
If your pantry shelves are spaced far apart, an under-shelf basket is such a clever little storage trick.
These wire baskets slide onto the edge of a shelf and hang underneath it.
Use them for lightweight items like tortillas, small snack bags, or packets of oatmeal.
Just check that the basket fits your shelf thickness and doesn’t interfere with the pantry doors.
12. Keep Baking Supplies Together in One Bin
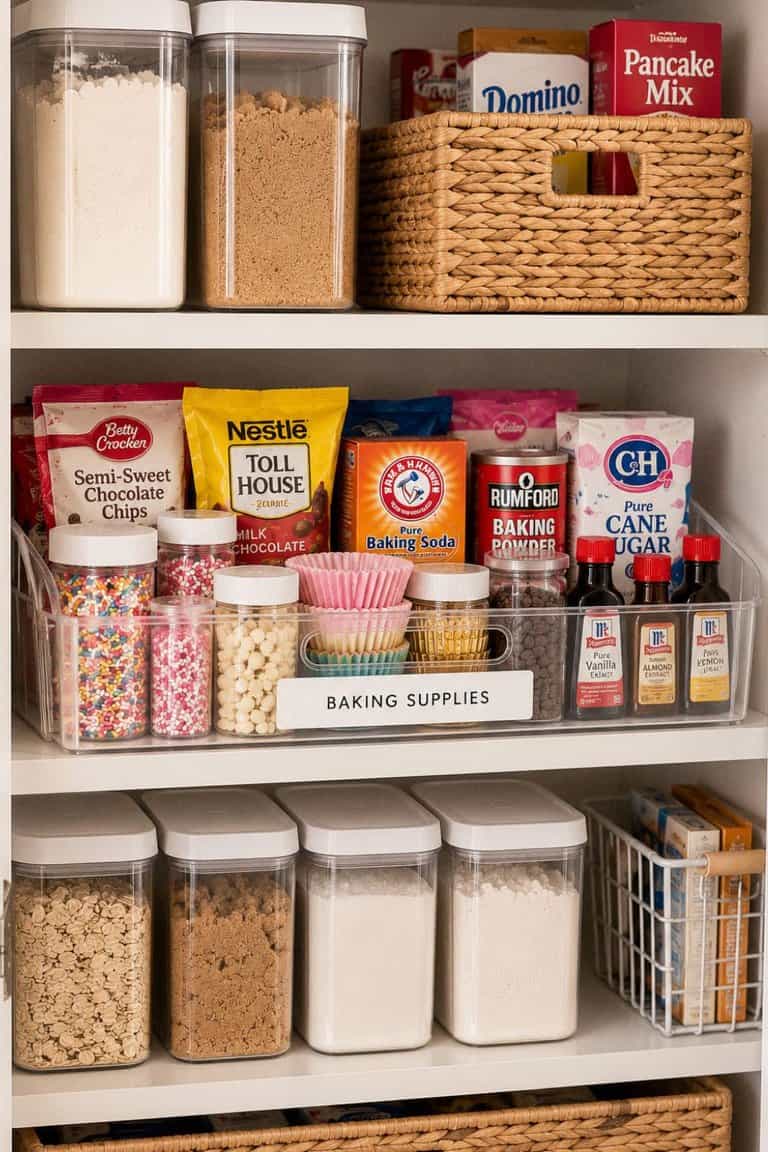
Nothing makes baking more frustrating than hunting for baking powder, chocolate chips, and vanilla in three different places.
Create one baking bin for your smaller supplies.
Keep sprinkles, baking soda, chocolate chips, cupcake liners, and unopened extracts together in a handled container.
Store larger bags of flour and sugar in airtight containers nearby.
When you’re ready to bake cookies, you can grab your baking bin instead of searching through the whole pantry.
13. Use Vertical Dividers for Baking Sheets and Cutting Boards
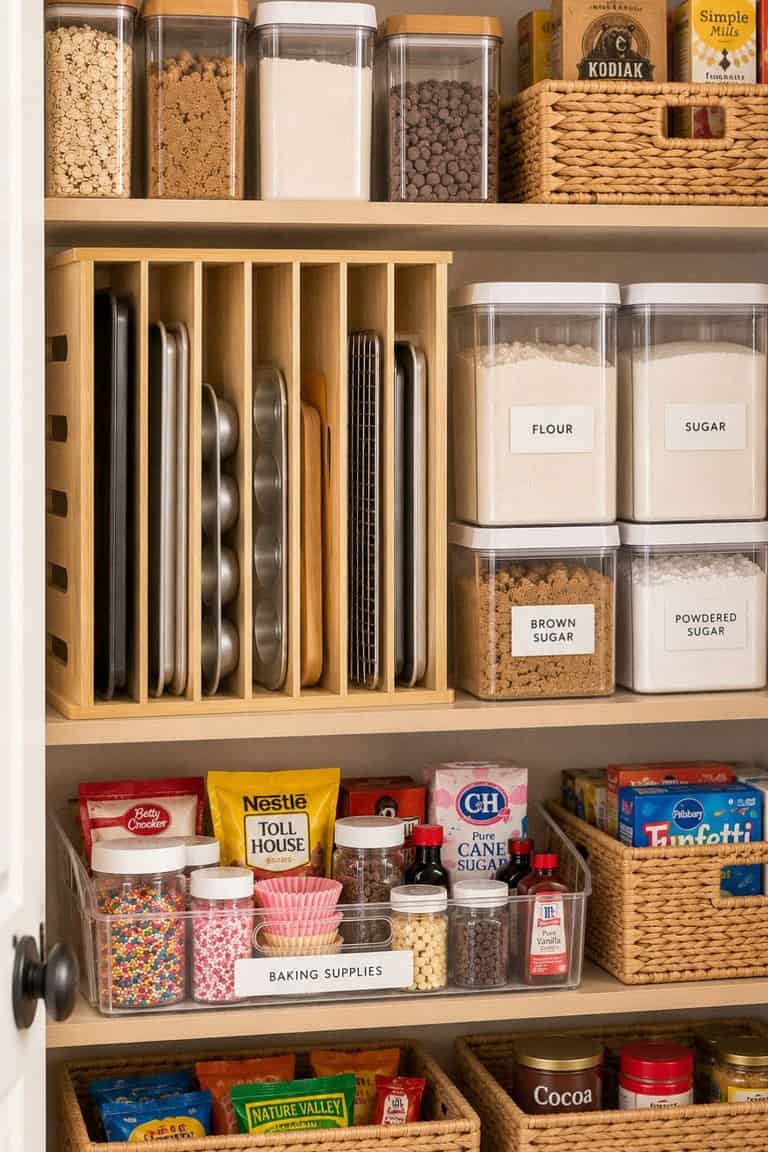
If your pantry cabinet has a tall open section, don’t waste it by piling things on top of one another.
Use a vertical divider rack to store cutting boards, baking sheets, muffin tins, and serving trays upright.
This is especially useful if your kitchen cupboards are already packed.
Choose a sturdy rack that fits the shelf depth, and put the heaviest items closest to the side of the cabinet for stability.
14. Store Small Packets in a Divided Organizer
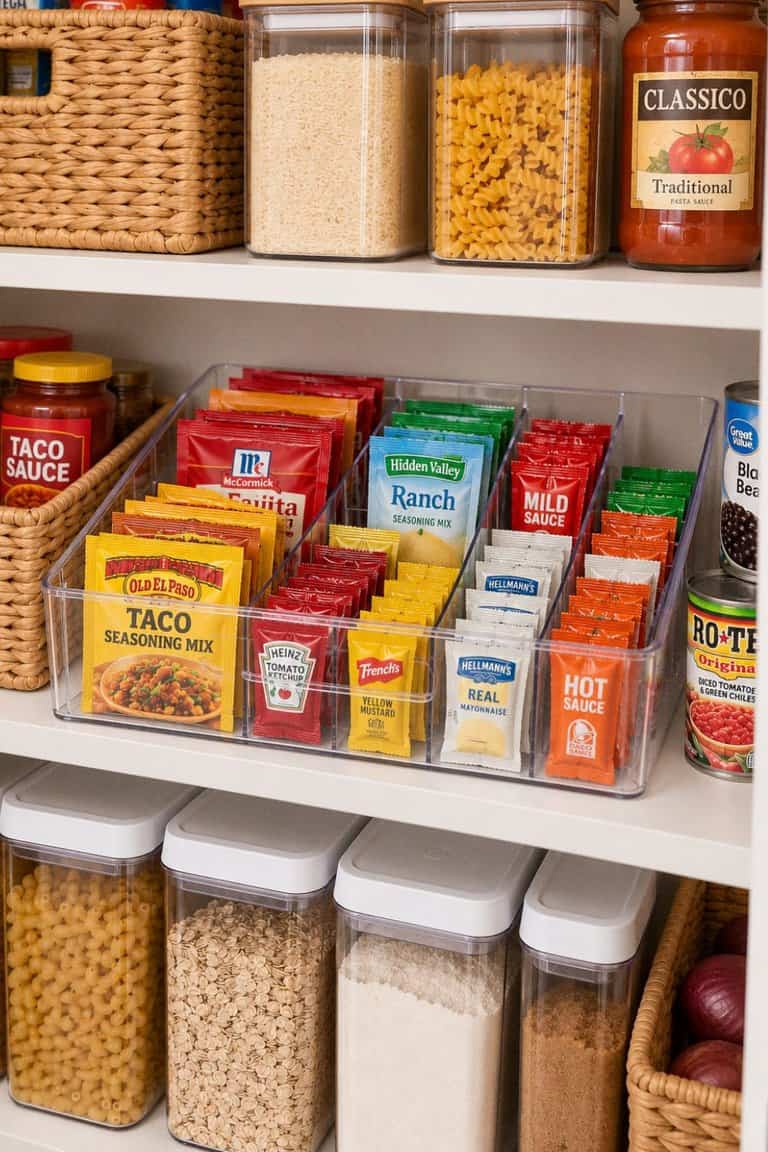
Those little packets of taco seasoning, gravy mix, instant oatmeal, and hot chocolate can create a surprising amount of clutter.
Instead of tossing them all into one basket, use a small divided organizer.
Give each section a category, and stand the packets upright so you can flip through them.
You can even use a simple desktop mail sorter if it fits your pantry shelf!
15. Use Matching Baskets to Hide Messy Packaging
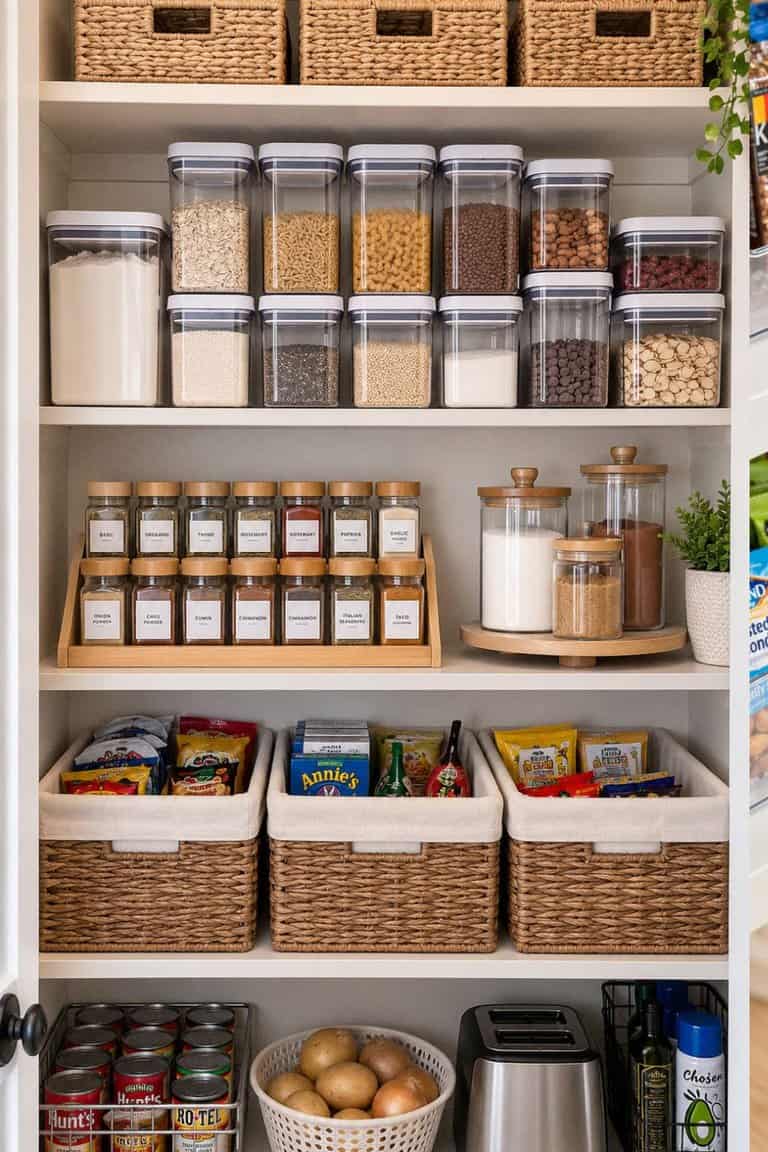
Okay, I love clear containers, but sometimes I don’t want to look at all those colorful snack packages!
This is where matching baskets come in.
Choose a few woven-look plastic baskets or washable bins that fit your shelves.
Use them for chips, crackers, breakfast foods, and miscellaneous packaged snacks.
Add simple labels to the front so everyone knows what’s inside.
Your pantry instantly looks more organized, even if the bags inside aren’t perfectly arranged.
16. Turn One Shelf Into a Breakfast Station
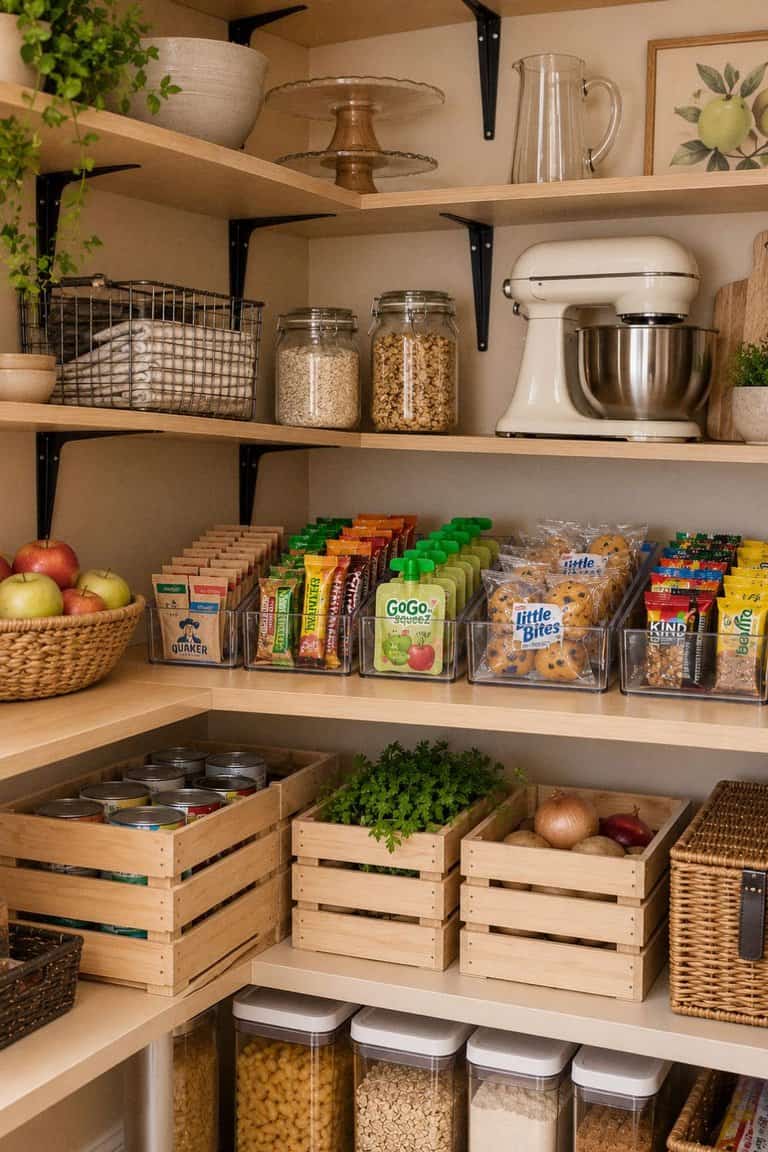
Mornings with teens can get pretty hectic, especially when everyone’s trying to get ready for school.
Make breakfast easier by keeping cereal, oatmeal packets, breakfast bars, and other morning staples together.
Use a large bin for oatmeal and breakfast bars, then line up cereal containers beside it.
If you have room, add a small basket for toppings like raisins, nuts, or dried fruit.
Now everything needed for a quick breakfast is in one spot.
17. Add Adjustable Shelf Heights
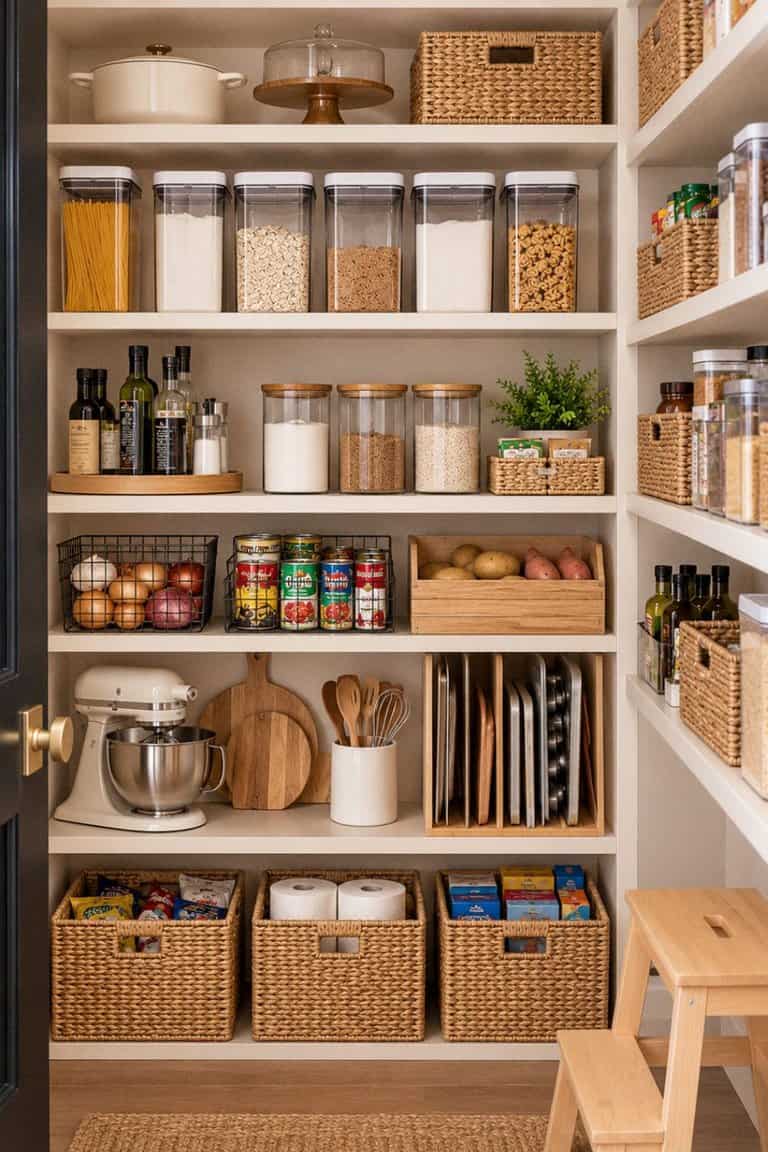
One of the biggest problems with basic pantry cabinets is that the shelves aren’t always spaced where you need them.
You might have one shelf with way too much space above it and another that barely fits a cereal box.
If your cabinet has adjustable shelf holes, move the shelves around to match what you’re actually storing.
Keep taller spaces for cereal containers and bottles, and shorter spaces for cans, jars, and snack bins.
If your shelves aren’t adjustable, freestanding shelf inserts can help you use that extra height.
18. Use a Small Basket for Opened Snack Bags
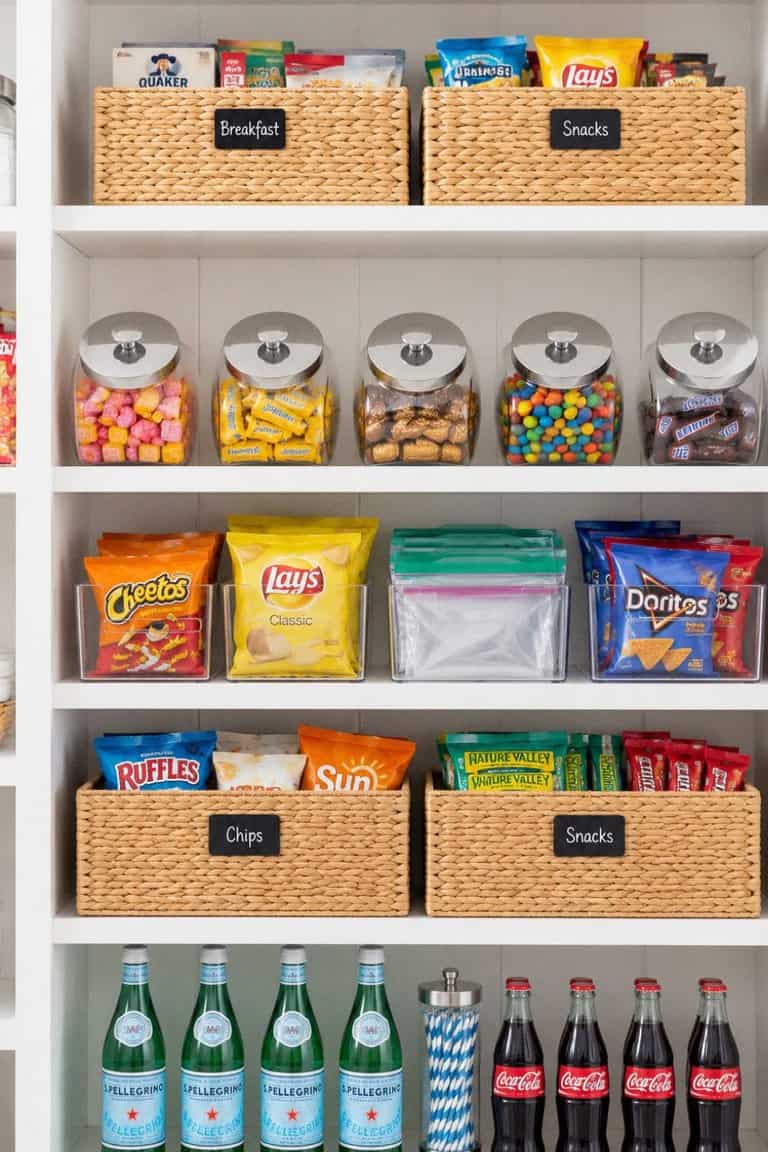
Does anyone else have a pantry full of chip bags with only a handful of chips left inside?
Instead of letting opened packages get mixed in with unopened ones, create an “Eat First” basket.
Put opened crackers, chips, cookies, and other snacks inside, using clips to keep the bags sealed.
Place the basket at eye level so everyone sees it before opening something new.
This is such an easy way to reduce food waste and keep those half-empty packages from taking over.
19. Make a Lunch-Packing Bin
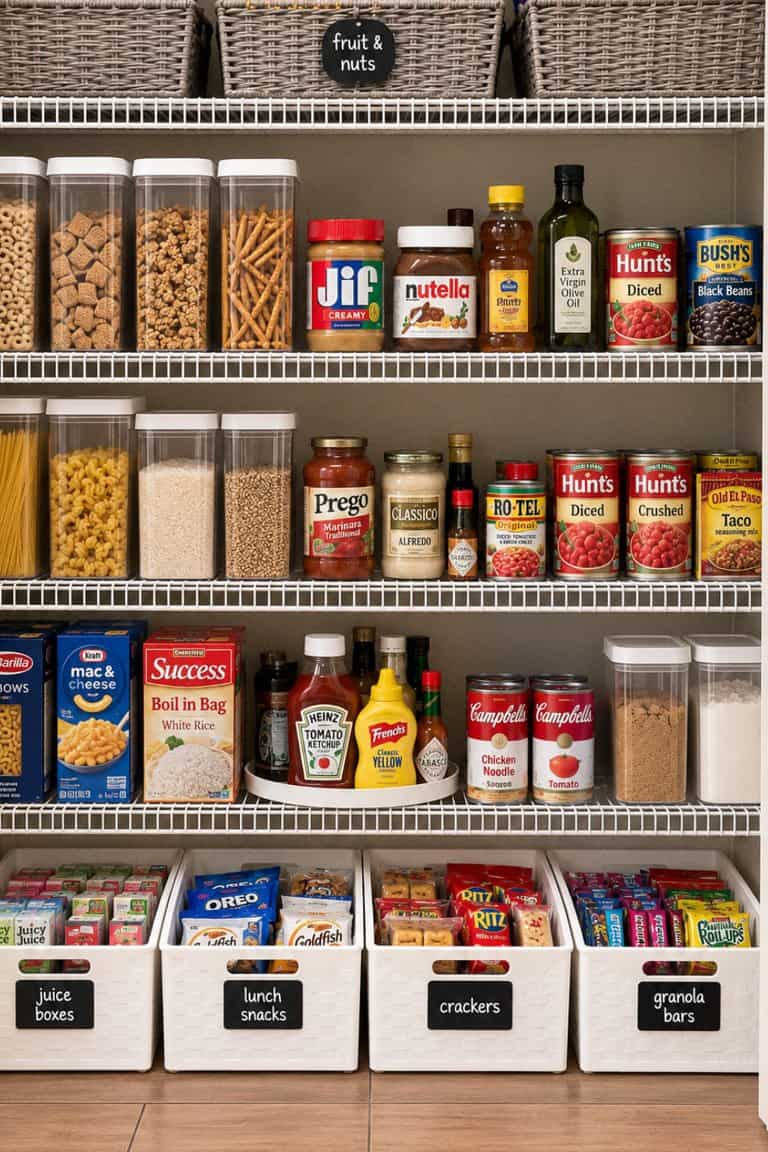
Even with teens, having lunch supplies in one place makes busy mornings SO much easier.
Use a handled basket for granola bars, crackers, fruit cups, and other shelf-stable lunch snacks.
Keep it separate from your everyday snack bin so the kids don’t accidentally eat all the lunch supplies before Wednesday!
You can refill it after grocery shopping and quickly see when you’re running low.
20. Store Heavy Foods on the Bottom Shelf
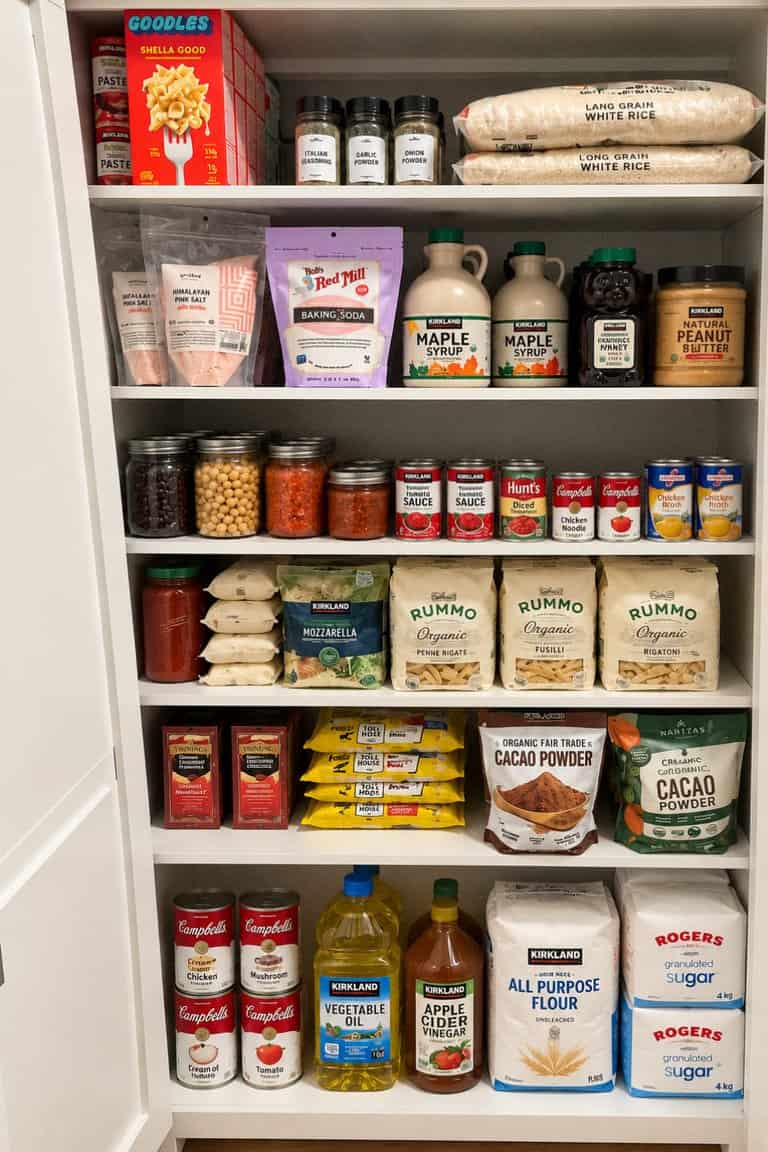
This might not be the prettiest pantry organizing idea, but it’s definitely one of the most practical.
Keep heavy items like large bags of rice, flour, canned goods, and extra beverages on the bottom shelf.
Use sturdy bins to prevent bags from tipping over or spilling.
Save the upper shelves for lighter items like cereal, crackers, paper products, and backup snack boxes.
This is especially important with freestanding pantry cabinets because you don’t want too much weight stored at the top.
And make sure your standalone pantry is properly anchored to the wall according to the manufacturer’s instructions.
21. Label Your Pantry Shelves So Everyone Knows Where Things Go
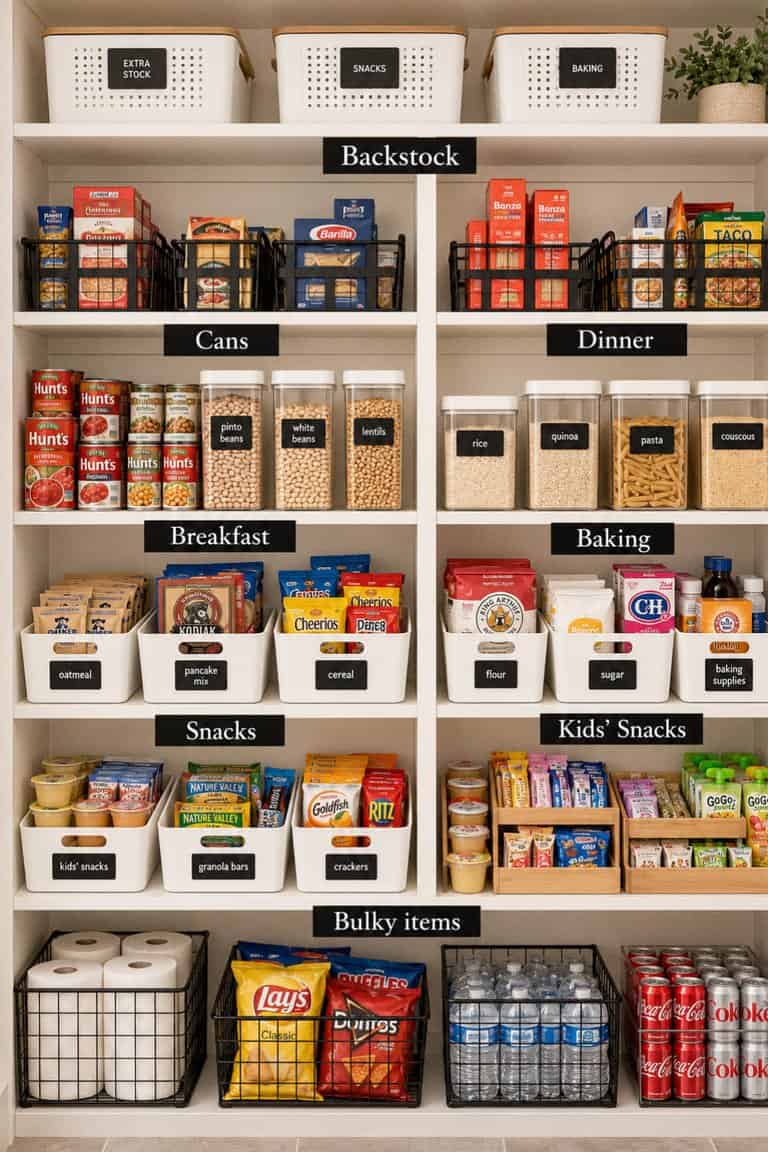
You can spend an entire afternoon organizing your pantry, but if nobody knows where anything belongs, it’ll be messy again by the weekend!
Trust me, I’ve been there.
Add simple labels to your baskets and shelves, such as “Snacks,” “Breakfast,” “Pasta & Rice,” “Baking,” and “Extras.”
You don’t need a fancy label maker. Printable labels, chalkboard stickers, or even masking tape with a marker will work.
The important thing is making your pantry easy for everyone in the family to use.
Because the goal isn’t to have a pantry that looks perfect for a Pinterest photo.
It’s to have a pantry where you can open the door, find the crackers in five seconds, and actually know what groceries you need to buy!
And with hungry teens in the house, I’ll take that kind of organization any day.
The Right Way to Organizer Your Pantry
There ya go!
No matter if you have a walk-in patnry or a small pantry, you can use some or all of these tips to help you maximize storage for you!
Don’t forget to pin me!