If you’re looking for a creative way to add even more charm to your flower garden, this DIY hummingbird feeder is a fun project to try.
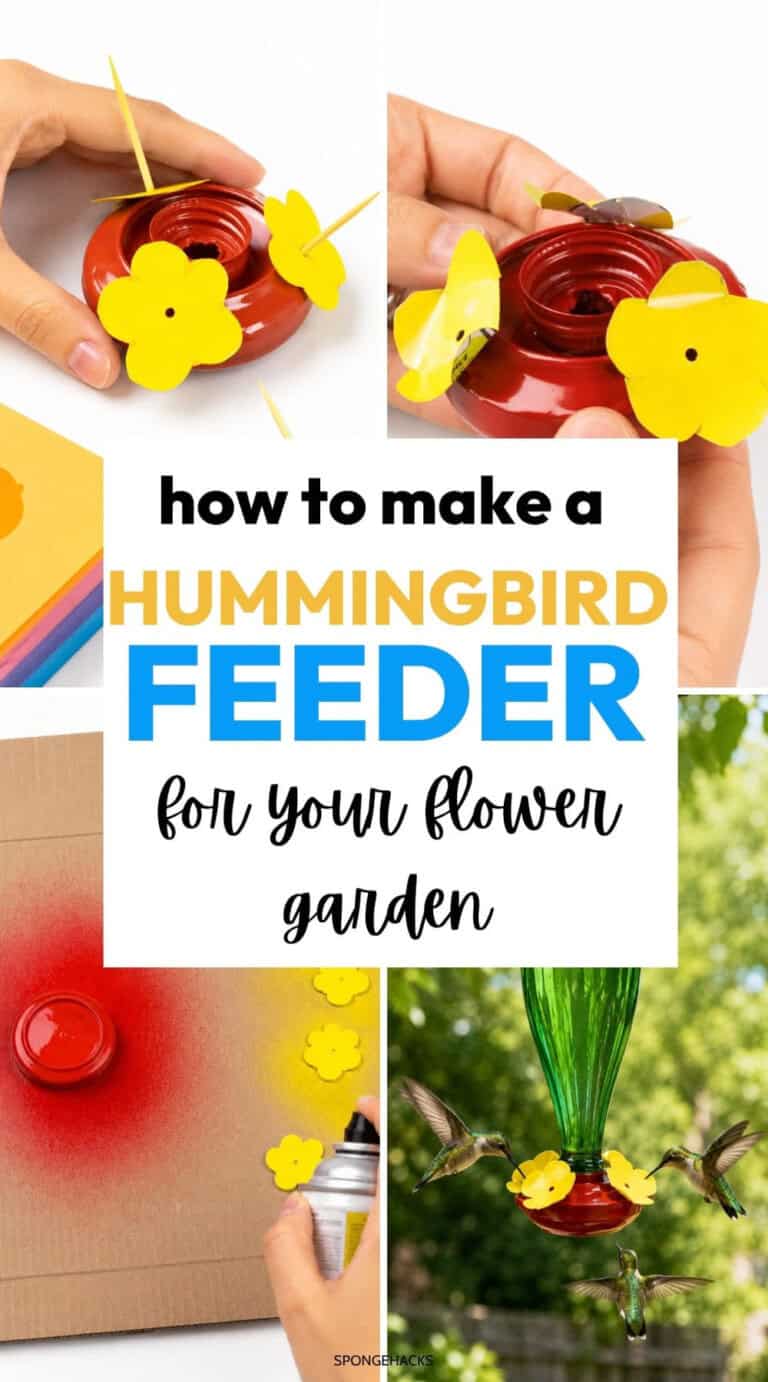
Made from a recycled bottle and aluminum cans, this colorful feeder doubles as garden decor while helping attract hummingbirds to your backyard.
I love projects that give old materials a second life, especially when they help create a garden that’s full of flowers, butterflies, and visiting birds.
This homemade feeder is inexpensive to make, surprisingly sturdy, and easy to customize with your favorite colors.
Plus it will go well with your DIY bird feeder and bird bath too!
Why You’ll Love This DIY Hummingbird Feeder
After reading this post, you’re going to want to MAKE this right now!
- Made from recycled materials
- Budget-friendly garden project
- Adds a pop of color to flower beds and patios
- Attracts hummingbirds to your yard
- Easy to customize with paint colors
Materials and Supplies You’ll Need
What I love about this hummingbird feeder is that most of the things you need you already probably have. There might be one or two things you have to get but other than that, you can make this DIY hummingbird feeder today!
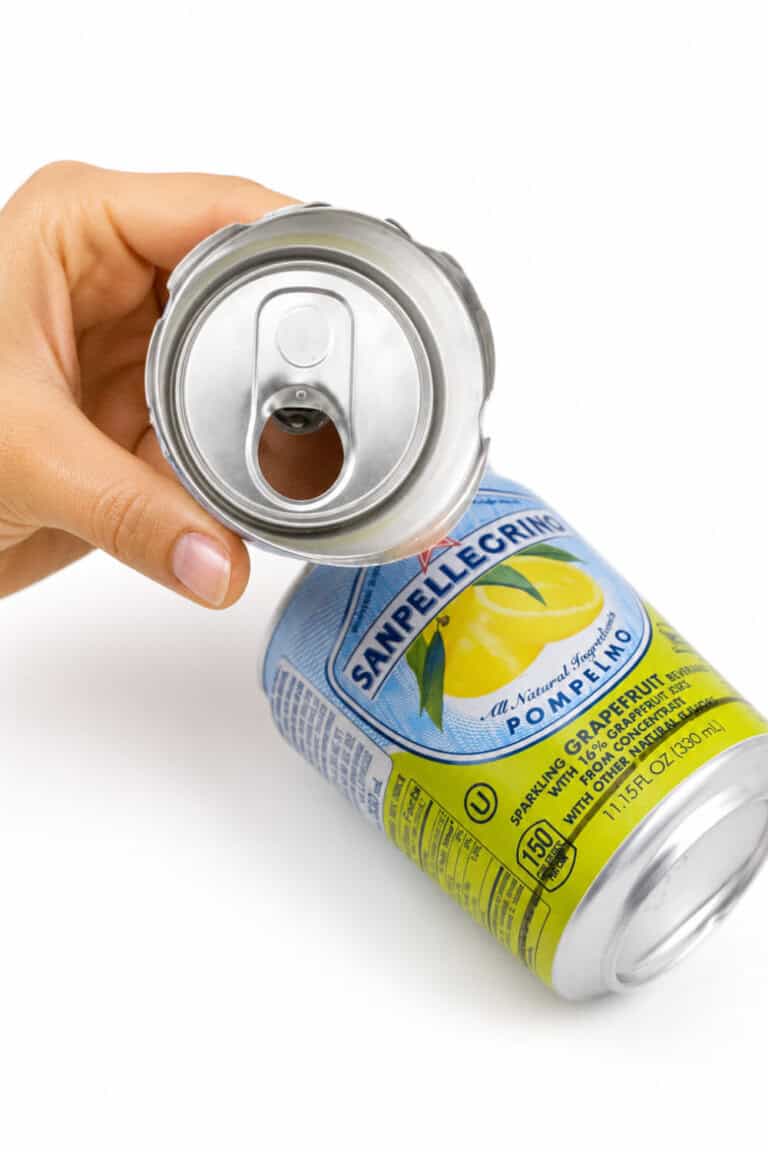
- Glass or plastic bottle with a screw-on cap
- 2 aluminum cans
- Scissors
- Flat-head screwdriver
- 1/8-inch drill bit or medium-sized nail
- 5-minute epoxy
- Toothpicks
- Spray paint (red, yellow, pink, or other bright colors)
- Twine, wire, or hot glue for hanging
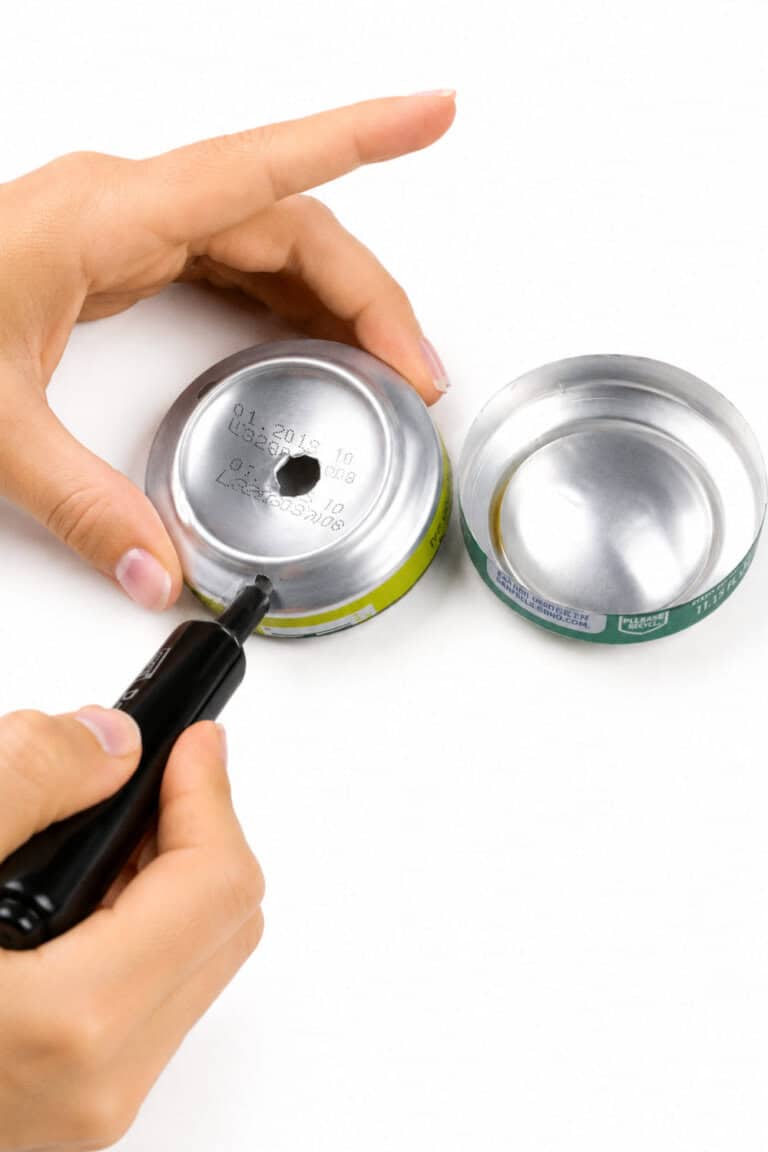
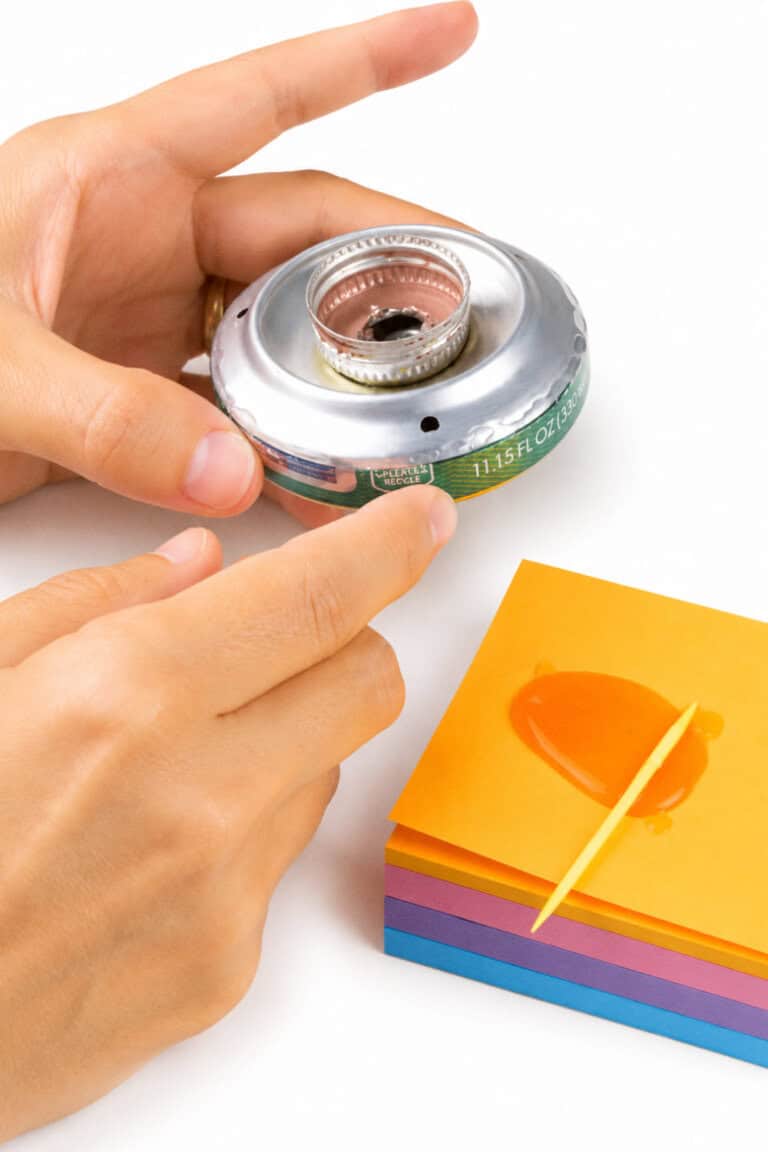
Step 1: Prepare the Bottle Cap
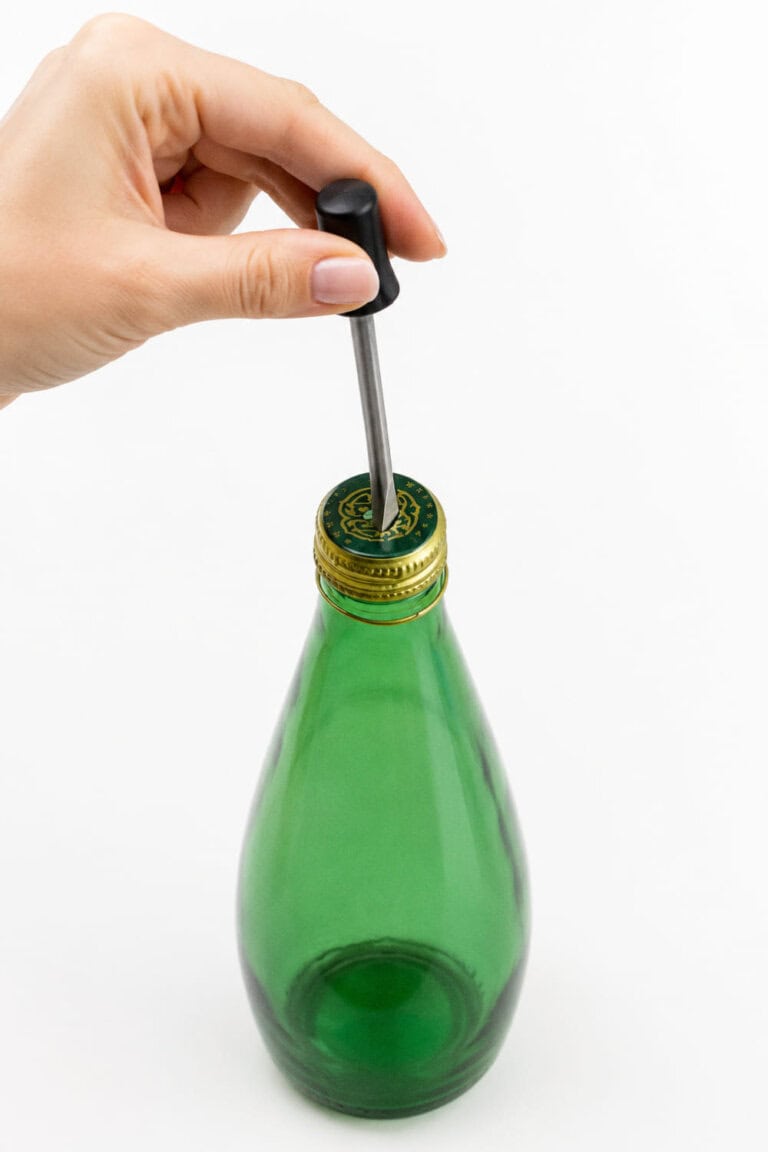
Using a flat-head screwdriver, carefully poke a hole through the center of the bottle cap.
Enlarge the hole with the tip of your scissors until it measures approximately 3/8 inch (1 cm) wide. This opening will allow the nectar to flow into the feeder.
Take one aluminum can and make a matching hole in the center of the bottom.
Step 2: Cut the Aluminum Cans

Next, mark both cans about 3/8 inch (1 cm) from the bottom edge.
Carefully cut around the marked line to remove the bottoms of the cans. Continue cutting down one side of each piece so they can fit together later.
Be careful while cutting, as the aluminum edges can be sharp.
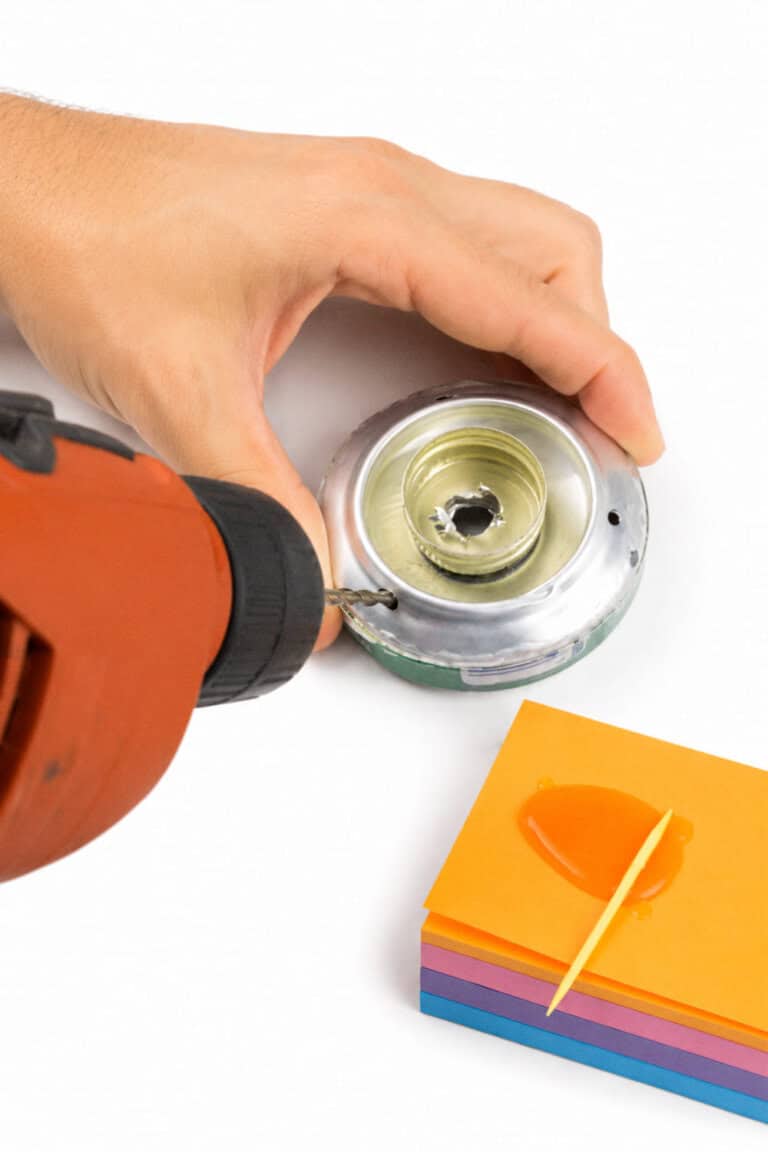
Step 3: Assemble the Feeder Base

Take the can bottom with the center hole and make three evenly spaced marks around the outer edge.
Make a single cut into one side and carefully fit it inside the second can bottom.
Mix a small amount of epoxy and apply it along the seam to create a watertight seal. Make sure to work fast before the epoxy hardens.
Step 4: Create the Feeding Ports
Spread the remaining epoxy on the flat side of the bottle cap and attach it to the center of the feeder base, making sure the holes line up.
Allow the epoxy to fully set. This should only take a few minutes.
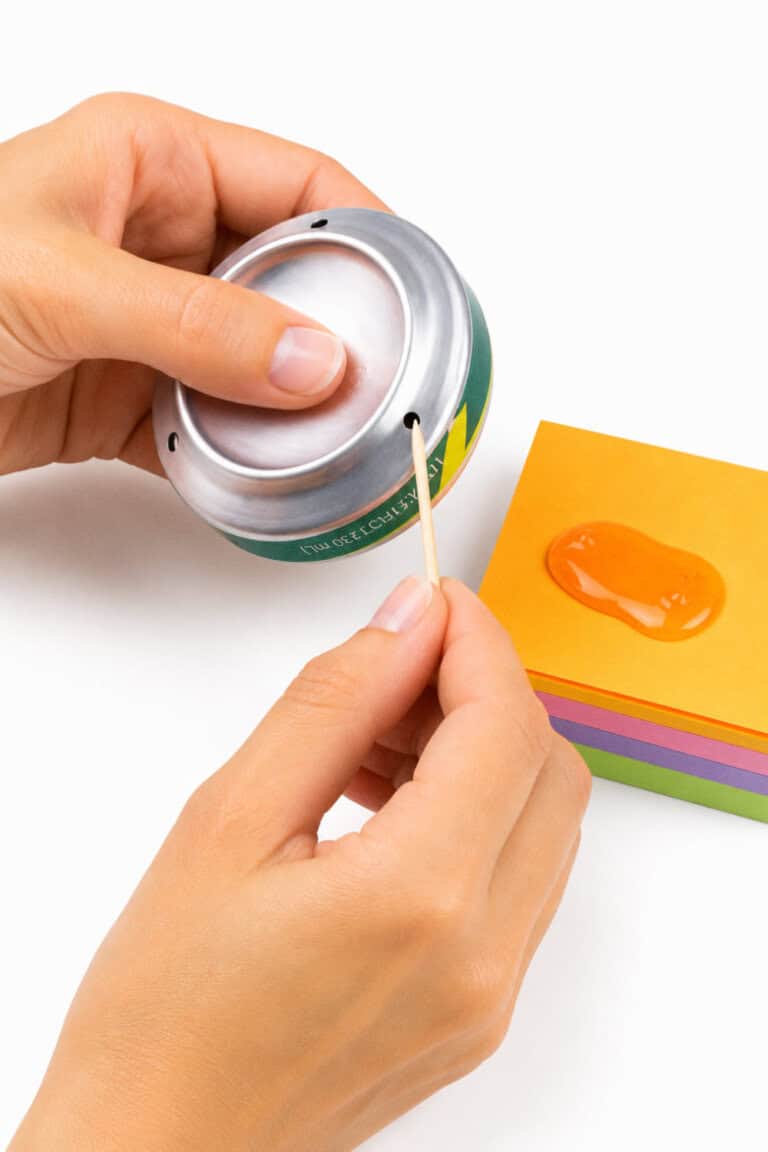
Using a 1/8-inch drill bit or nail, make three evenly spaced holes around the outer edge of the feeder base.
These openings will serve as the feeding ports for hummingbirds.
Step 5: Make the Decorative Flowers
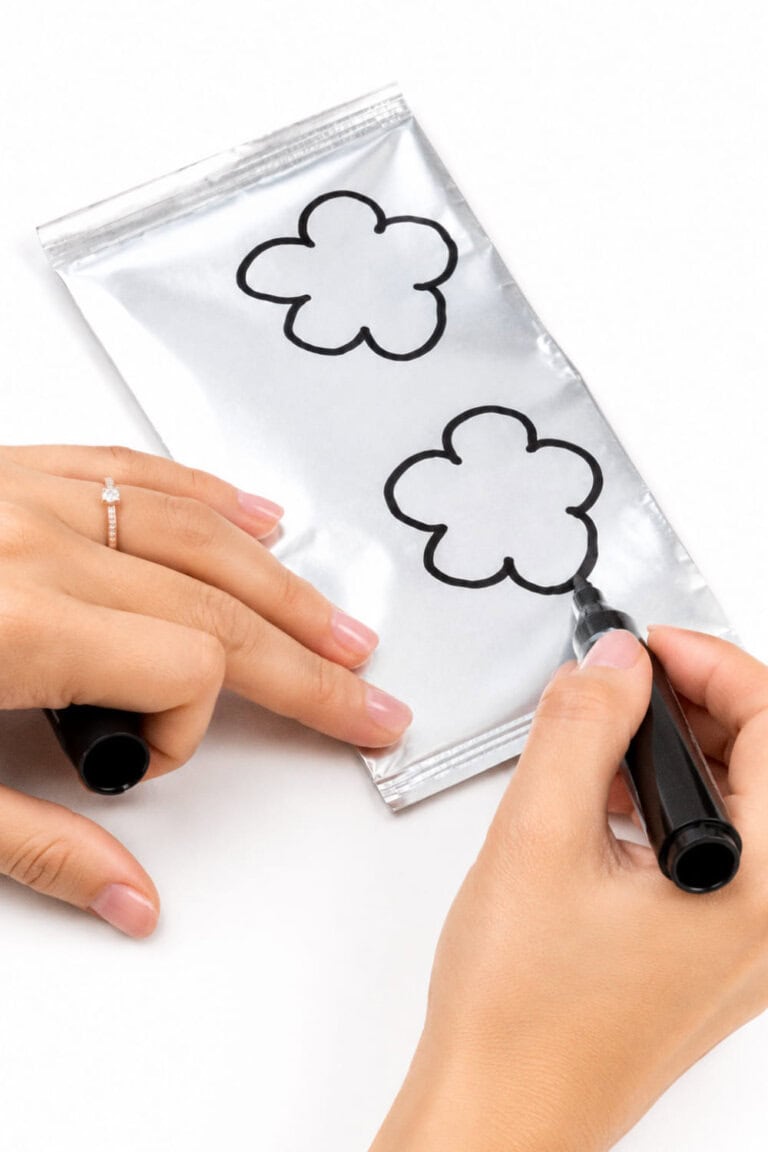
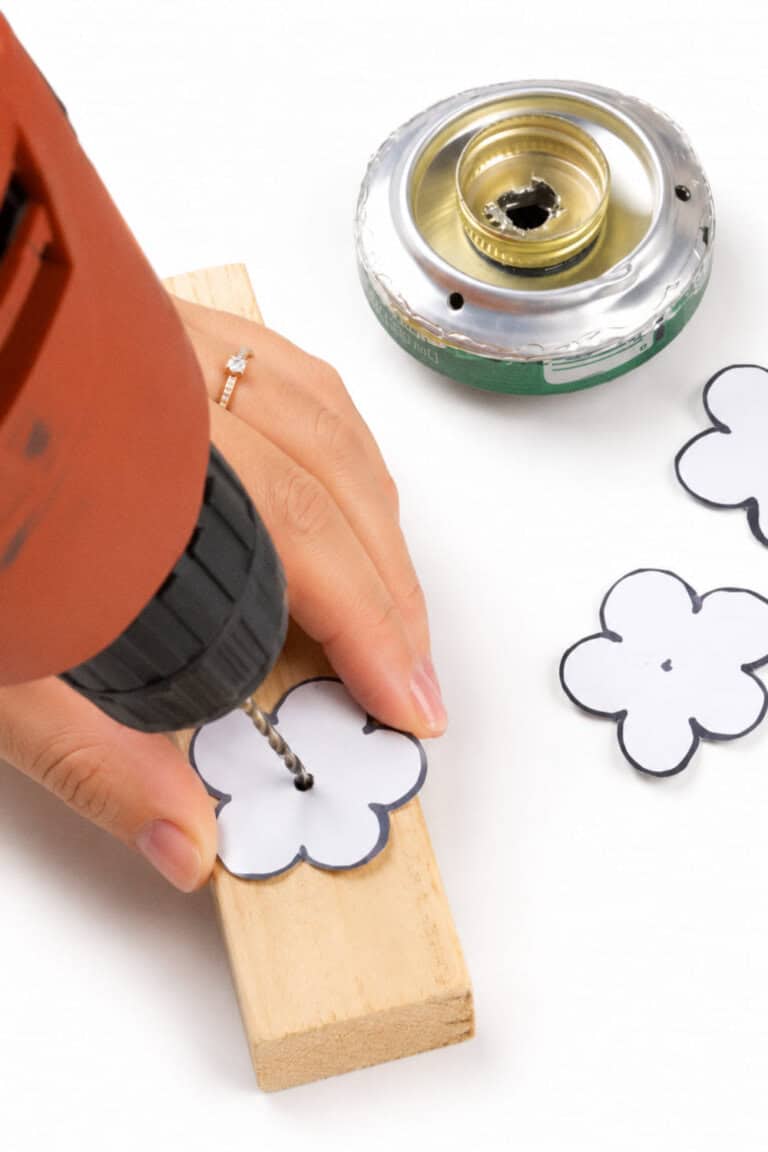
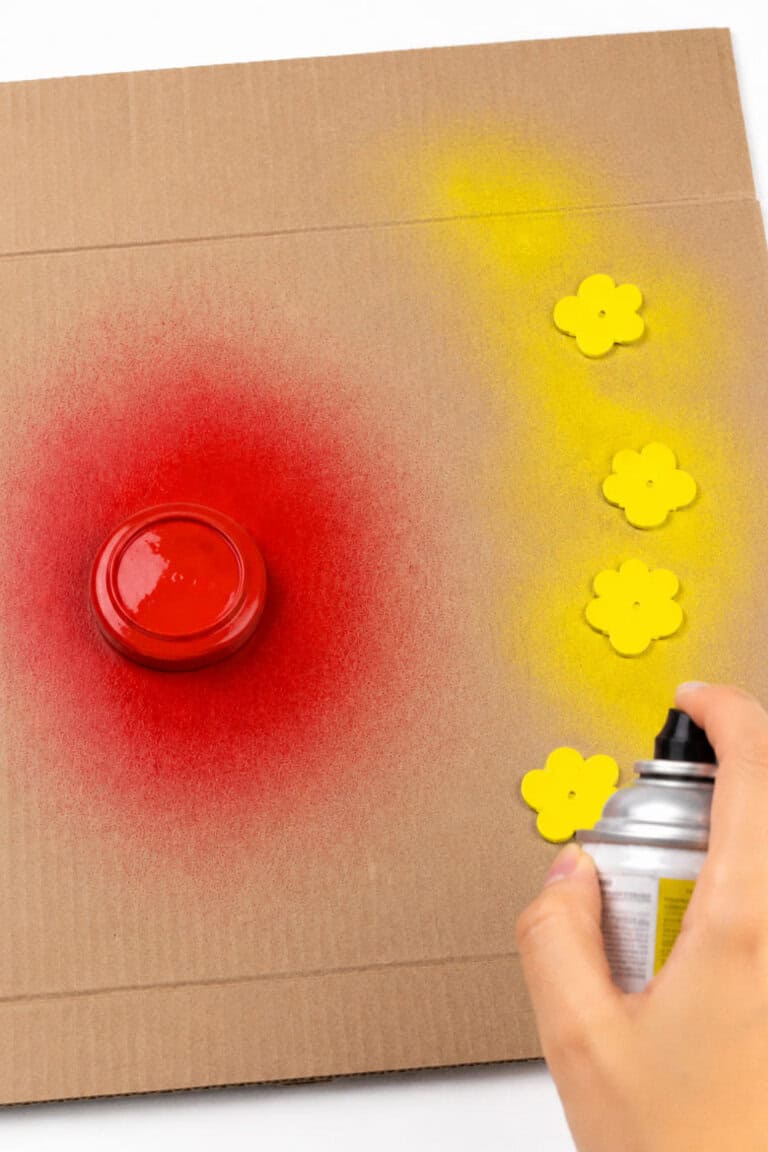
Using the leftover aluminum can pieces, cut flower shapes about 1 to 1½ inches in diameter.
Drill a small hole in the center of each flower.
Spray paint the flowers in bright colors such as red, yellow, pink, or orange. These colors help attract hummingbirds and make the feeder look like blooming flowers.
Allow the paint to dry completely before moving on.
Step 6: Attach the Flowers
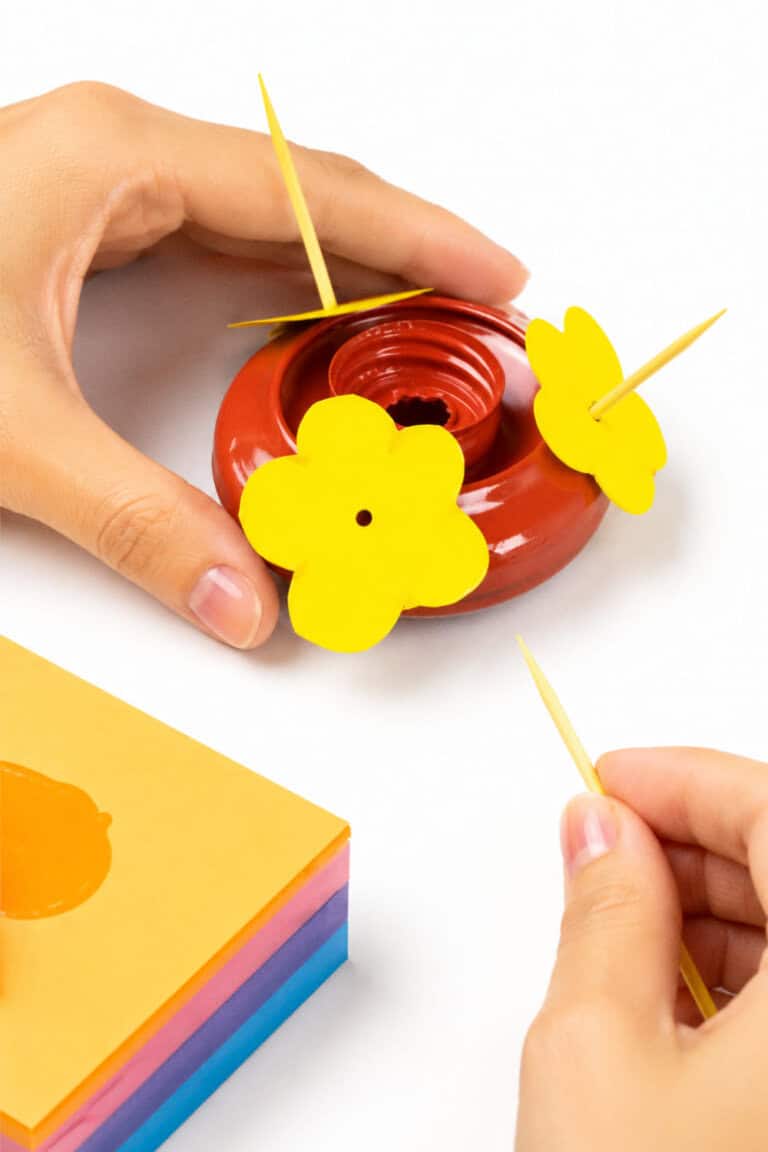
Mix another small batch of epoxy.
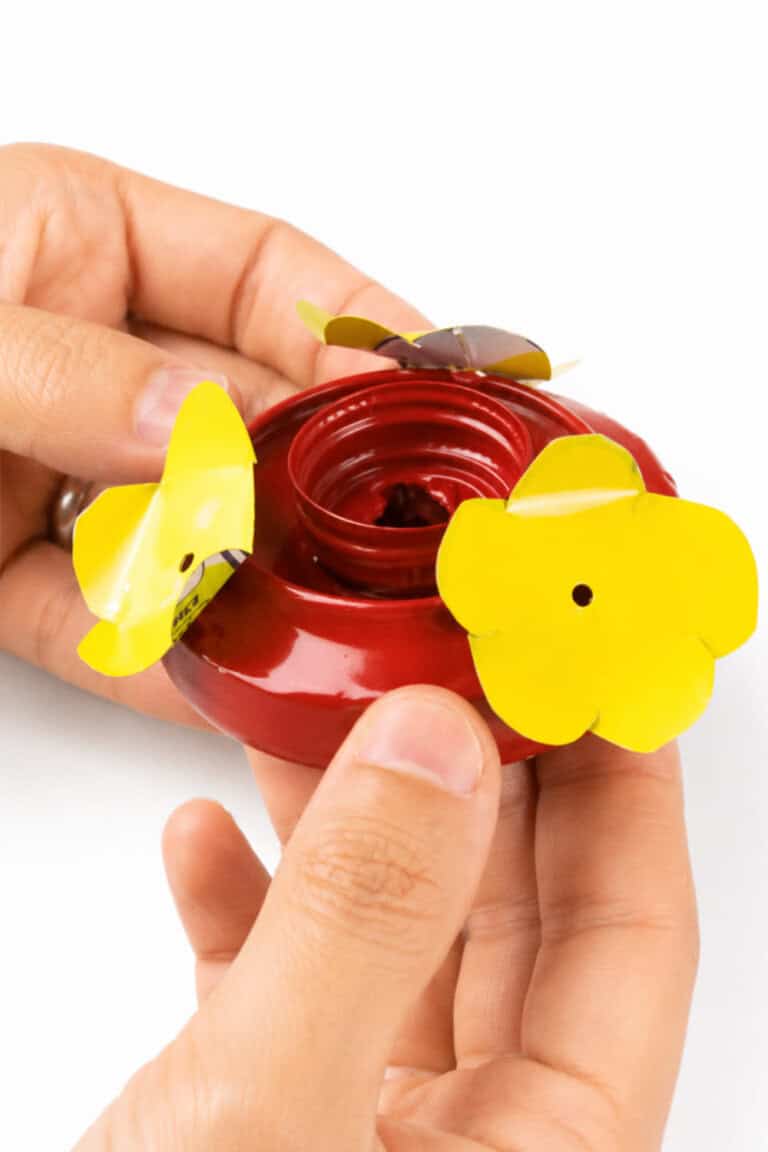
Place a toothpick through the center hole of each flower to help align it with the feeding ports. Glue the flowers in place and remove the toothpicks before the epoxy hardens completely.
Once secure, gently bend the petals upward for a more natural flower shape.
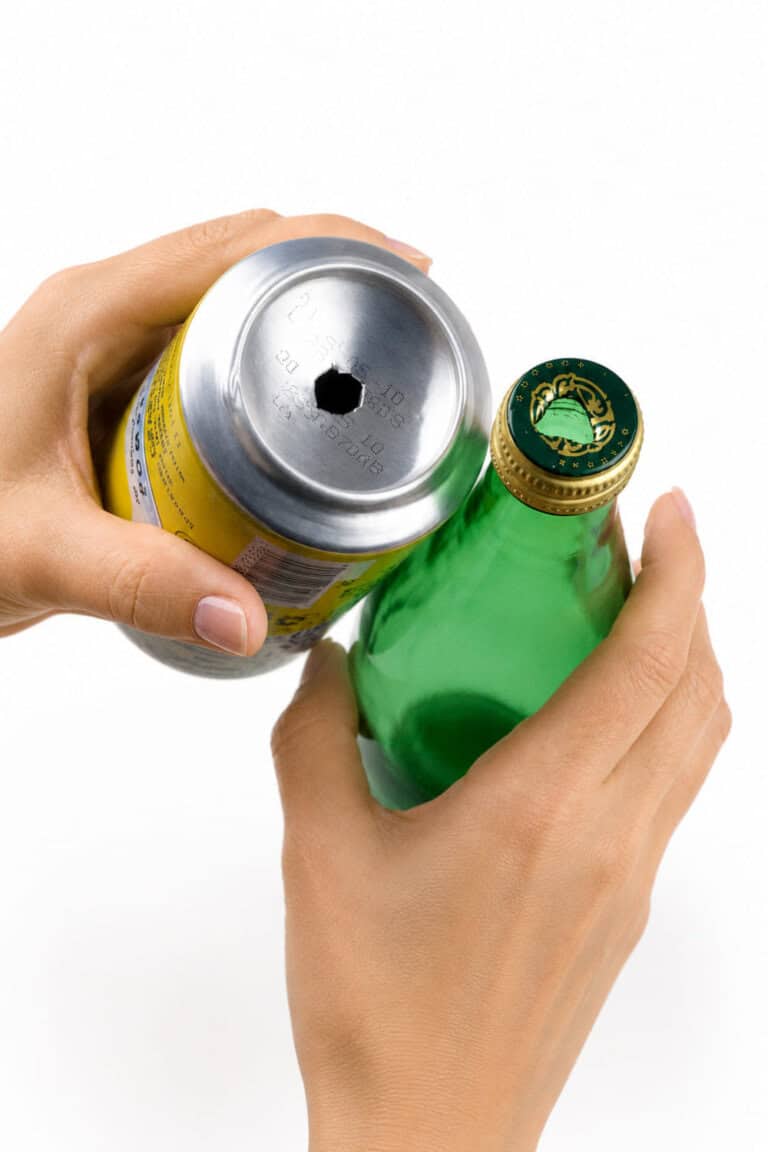
Step 7: Attach the Bottle & Add a Hanger
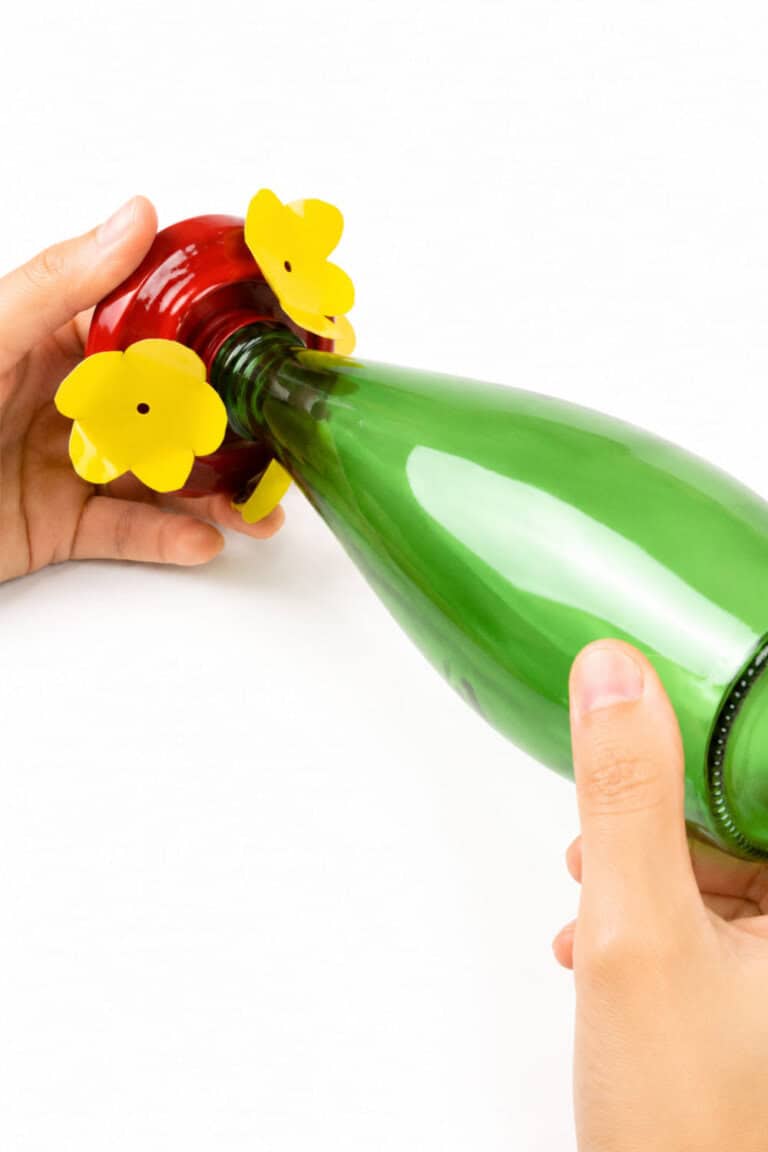
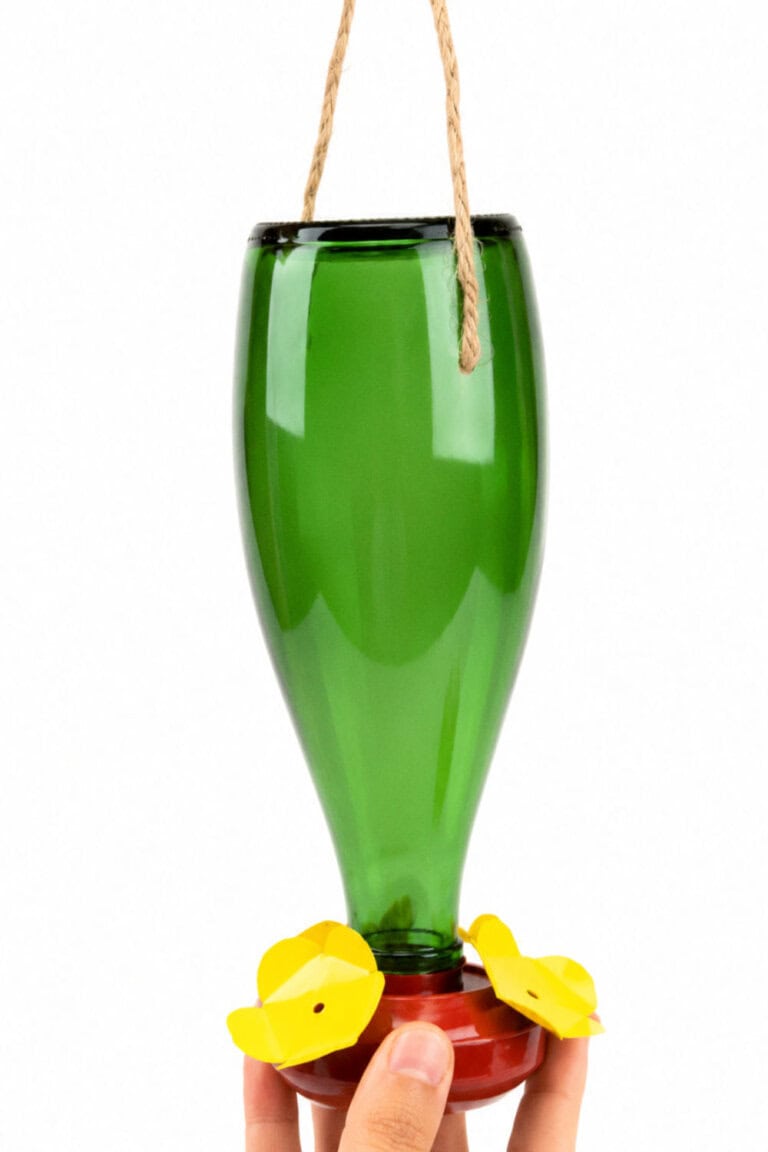
Fill the bottle with homemade hummingbird nectar.
Turn the feeder base upside down and screw the bottle into the bottle cap assembly.
The bottle will slowly dispense nectar into the flower feeding ports.
Use twine, wire, or hot glue to create a hanging loop around the bottle.
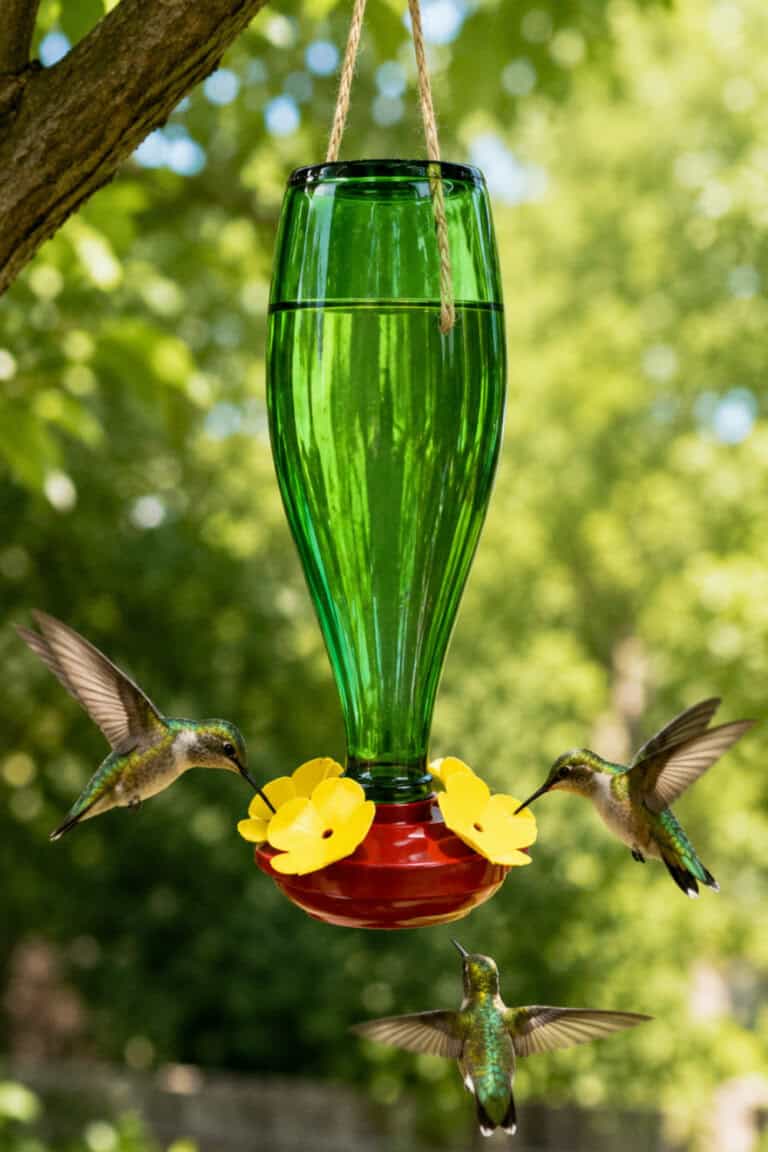
Hang your feeder near flowering plants, garden beds, or a sunny patio where hummingbirds are likely to visit.
Homemade Hummingbird Nectar Recipe
You only need two simple ingredients:
- 1 cup white sugar
- 4 cups water
Directions
- Bring the water to a boil.
- Stir in the sugar until fully dissolved.
- Allow the mixture to cool completely.
- Fill your feeder.
Avoid honey, artificial sweeteners, and red food coloring.
Tips for Attracting More Hummingbirds
- Place your feeder near brightly colored flowers.
- Grow hummingbird favorites like bee balm, salvia, petunias, and trumpet vine.
- Keep nectar fresh and clean the feeder regularly.
- Hang feeders in a partially shaded location.
- Add multiple feeders around larger gardens.
Frequently Asked Questions
What color attracts hummingbirds?
Red is the most attractive color to hummingbirds, but they are also drawn to pink, orange, and yellow flowers.
How often should I clean my feeder?
Clean the feeder every few days during hot weather and at least once a week during cooler temperatures.
Can I use a plastic bottle?
Yes. Both plastic and glass bottles work well for this project.
Where should I hang a hummingbird feeder?
Choose a quiet location near flowers where hummingbirds can easily spot the feeder and feel safe while feeding.
Your DIY Hummingbird Feeder
A DIY hummingbird feeder is an easy way to add personality to your flower garden while welcoming more wildlife into your backyard.
With a few recycled materials and a splash of paint, you can create a colorful garden feature that’s both beautiful and functional.
Once it’s hanging among your flowers, don’t be surprised if hummingbirds start stopping by for a visit.